DirectOverkill
Neuling
Thread Starter
- Mitglied seit
- 22.09.2011
- Beiträge
- 2
Hello german speaking friends!
First I have to tell you that I am sorry I have to describe my project in english, but my Deutsch is a bit slow
Anyway I have acquired some useful tips on this forum as well so I would like to give something back. My build
Some time has past since I decided not only build, but also display computer for all doubters, non believers (in power and beauty of water cooling) and people who are generally interested in hardware.
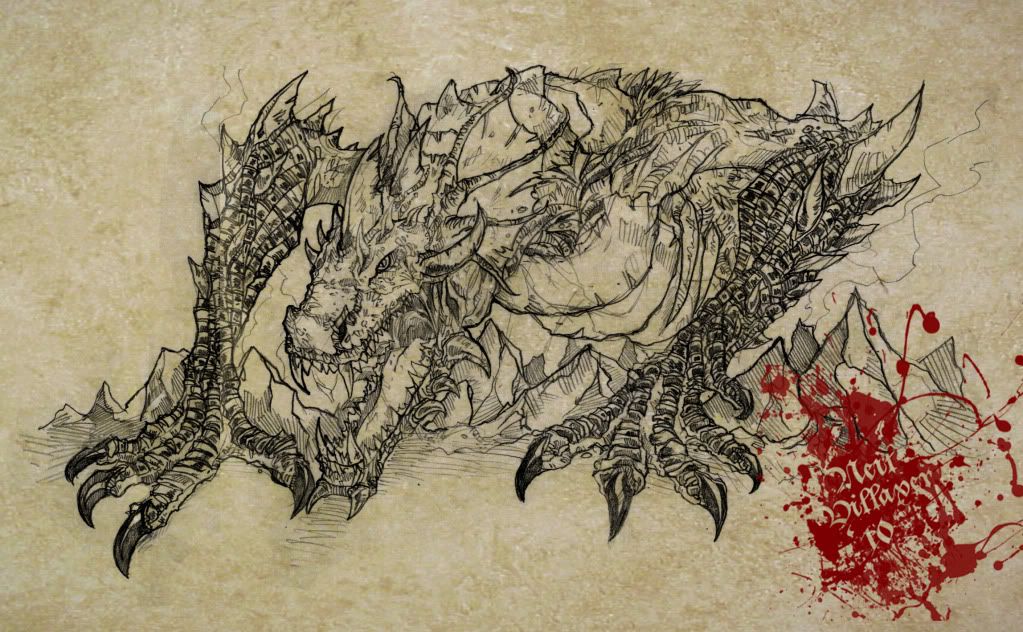
As a log must have a title I named mine after a dragon in Philippine mythology that is often represented as a gigantic sea serpent. It is believed to be the cause of eclipses.
It appears as a giant sea serpent with a mouth the size of a lake, a red tongue, whiskers, gills, small wires at its sides, and two sets of wings, one is large and ash-gray while the other is small and is found further down its body [source: Wiki].
Cooling equipment:
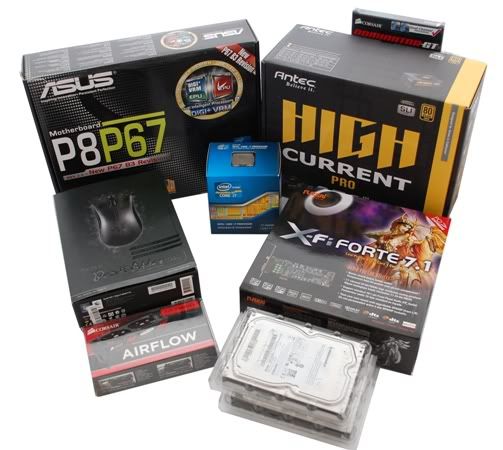
CPU blocks: EK-Supreme HF - Full Nickel
GPU block: EK-FC6990 Nickel with backplate
VRM block: EK-MOSFET ASUS P8P67 - EN (Nickel)
RAM block: EK-RAM Dominator - EN (Nickel)
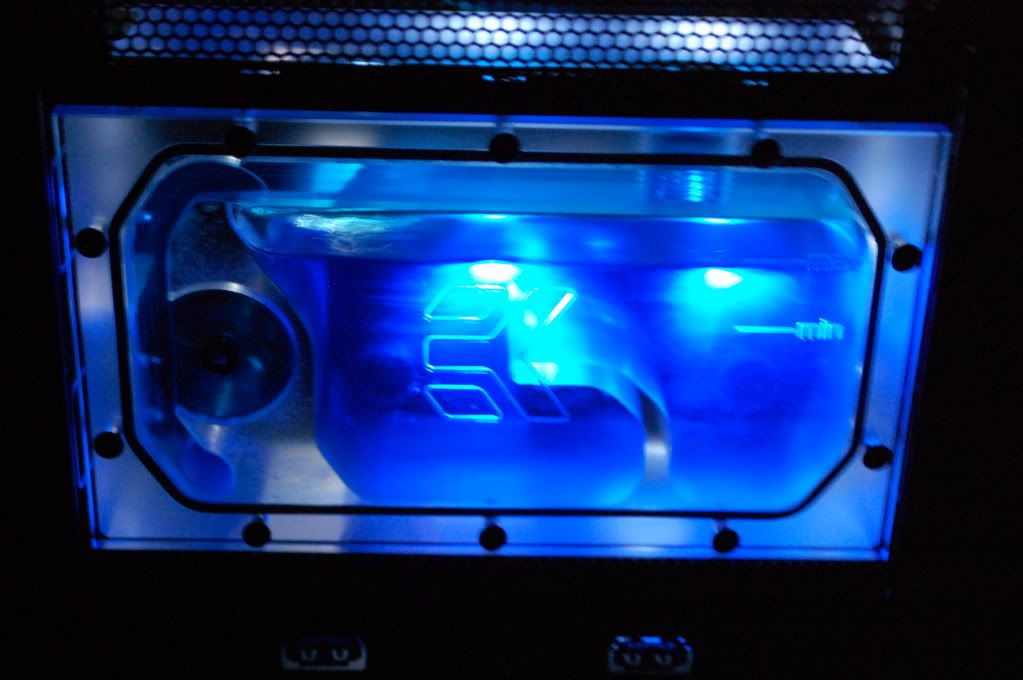
Reservoir: EK-BAY SPIN Reservoir - Plexi
Pump: EK-DCP 4.0 (12V DC Pump)
Radiator: EK-CoolStream RAD XTX (360) & EK-CoolStream RAD XTC (140)
Fans: Xigmatek XLF-F1256 Blue - 120mm
Fittings: EK-PSC Fitting 10mm - G1/4 E-Nickel & EK-PSC Adapter 45° G1/4 Nickel
I was most confused about the case and the size it was needed to put all the hardware inside. Mouse excluded
then I came across with this one
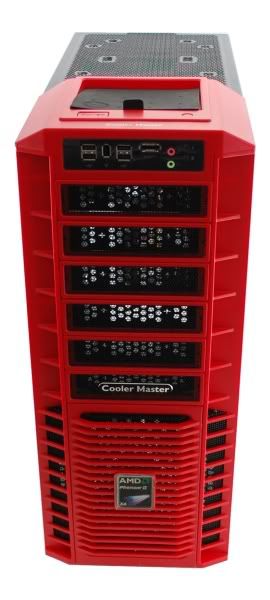
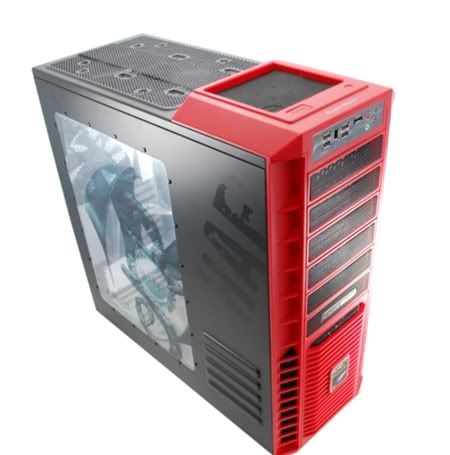
dragon alike figure was just something a BIG YES! for me as I did not feel comfortable doing custom design on sides of case.
More pics of case


and then black spray painted


While the case was away and getting dry I had block EK-FC6990 block installed onto card


a CPU block is pure mirror finish job

A close up of PSU


Before with pre installed 140 fan by coolermaster

and after with a big XTX radiator

Positioning of blocks is more or less final


A GPU block and a sound card are very close. Now I understand why ppl worry when going with SLI. This is not a work for ppl with two left hands.:\

A close up to Voltage Regulator Module water block

HDDs are set. 2 Teras should last me for a while. And man am I glad I bought them before the flooding in Thailand. The prices now are outrageous.

I was first thinking positioning a pump right under HDDs, but that would involve some cutting and a case was already painted :whistling:

While I was at it and checked for all the space I thought another radiator would not hurt

And I was not wrong!
..after all the hard work a man needs to cool off. Got a freebie from ek along my order. Nice gesture

A lovely reflection in backplate of work done so far.

Bring on the tube routing!


Continued:
A CPU block had to be reorientated, because tubes are just too close to each other and kinks had to be avoided
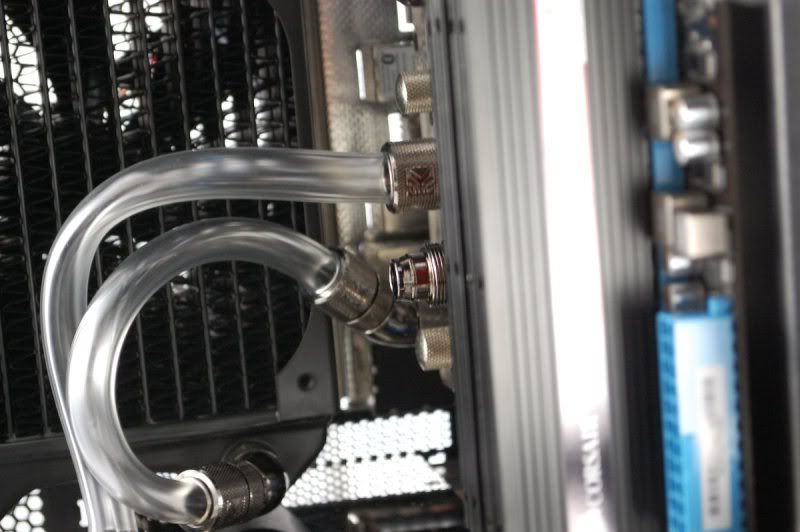

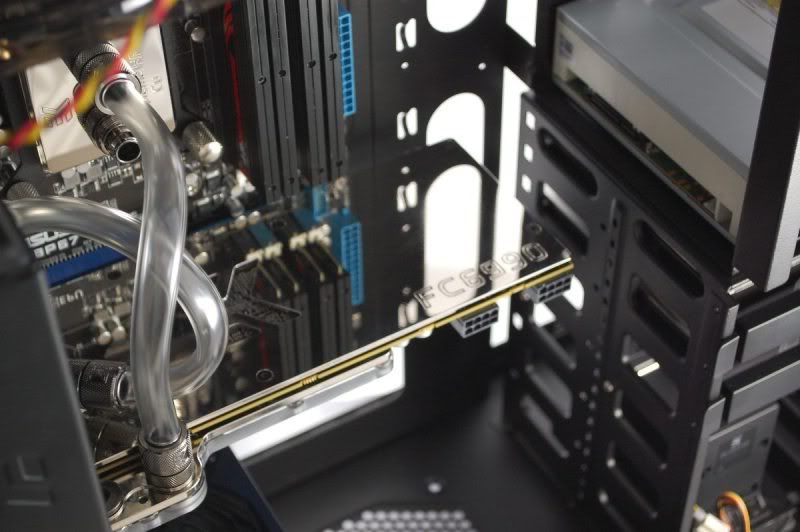
You can still spot a small kinks on this pic , but that little DCP pump is strong enough to push the flow. Tubes feel more sturdy and inflated once you power it up, hence a good pressure.
Adding a RAM block:


Installing reservoir:
I decided to go with bay reservoir as front of case looks just plain boring.


A final look of tube routing is something like this:

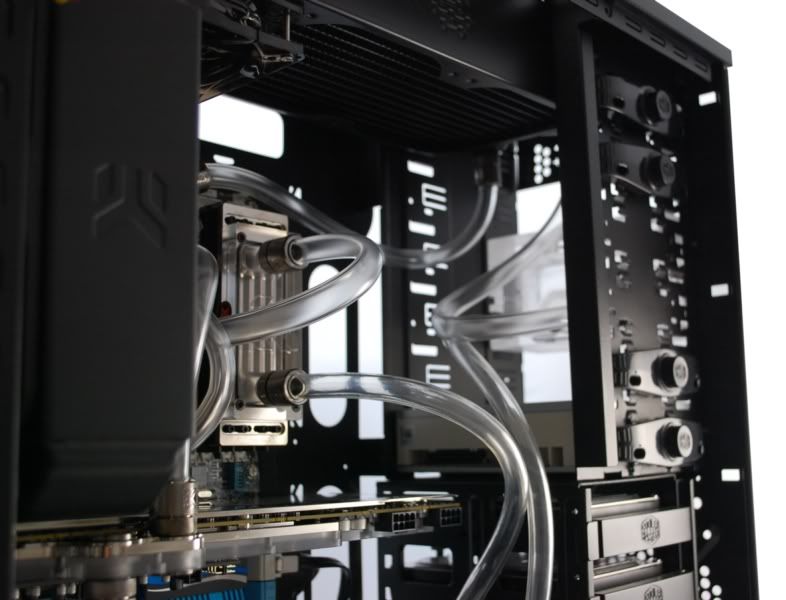
I think blue coolant goes well with blue motherboard's aluminum stock sinks.
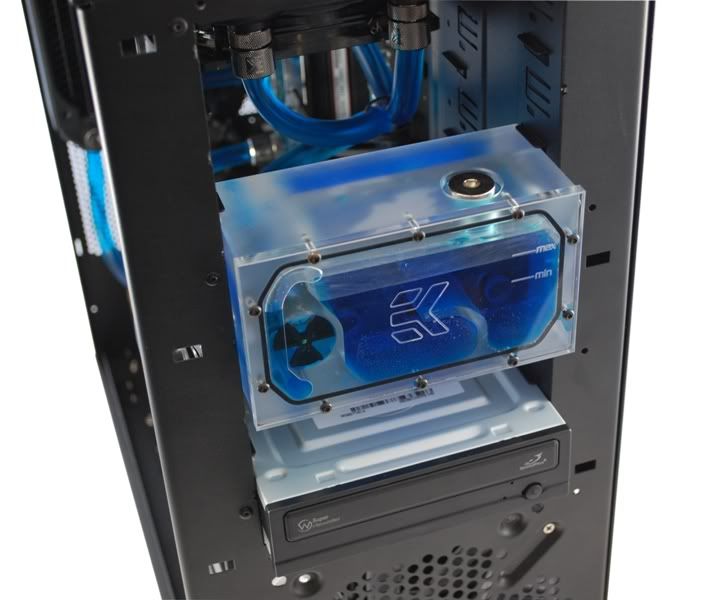


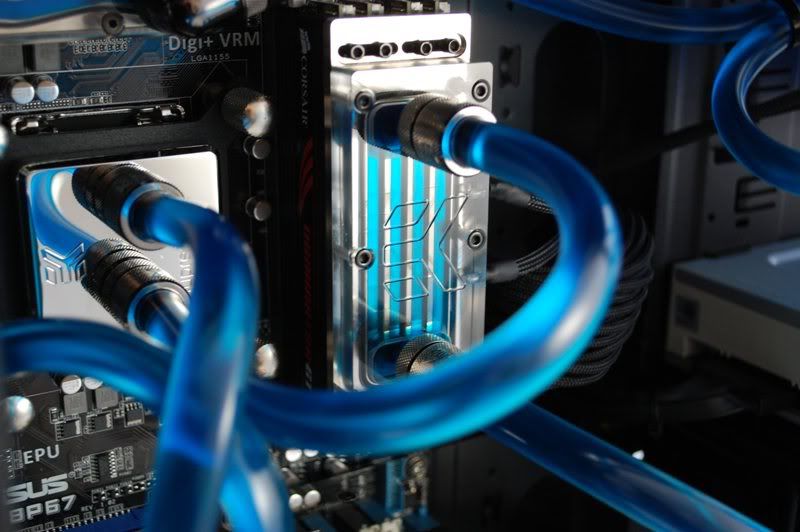
And the final product

At this point I would like to thank to Tiborrr@EKWB for great installation hints and to Eddy for making such a great water cooling stuff. Cheers!
I also had a little accident during spray painting of front red mask. I was going for black scheme, but ended up buying a replacement panel.
More photo with front mask on.


UV Ekoolant under LED light.
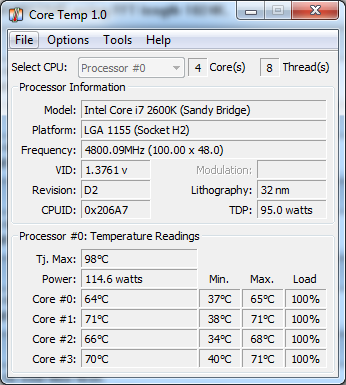
Overclocking and performance


First I have to tell you that I am sorry I have to describe my project in english, but my Deutsch is a bit slow

Anyway I have acquired some useful tips on this forum as well so I would like to give something back. My build

Some time has past since I decided not only build, but also display computer for all doubters, non believers (in power and beauty of water cooling) and people who are generally interested in hardware.
As a log must have a title I named mine after a dragon in Philippine mythology that is often represented as a gigantic sea serpent. It is believed to be the cause of eclipses.
It appears as a giant sea serpent with a mouth the size of a lake, a red tongue, whiskers, gills, small wires at its sides, and two sets of wings, one is large and ash-gray while the other is small and is found further down its body [source: Wiki].

Cooling equipment:
CPU blocks: EK-Supreme HF - Full Nickel
GPU block: EK-FC6990 Nickel with backplate
VRM block: EK-MOSFET ASUS P8P67 - EN (Nickel)
RAM block: EK-RAM Dominator - EN (Nickel)
Reservoir: EK-BAY SPIN Reservoir - Plexi
Pump: EK-DCP 4.0 (12V DC Pump)
Radiator: EK-CoolStream RAD XTX (360) & EK-CoolStream RAD XTC (140)
Fans: Xigmatek XLF-F1256 Blue - 120mm
Fittings: EK-PSC Fitting 10mm - G1/4 E-Nickel & EK-PSC Adapter 45° G1/4 Nickel
I was most confused about the case and the size it was needed to put all the hardware inside. Mouse excluded

then I came across with this one


dragon alike figure was just something a BIG YES! for me as I did not feel comfortable doing custom design on sides of case.
More pics of case


and then black spray painted


While the case was away and getting dry I had block EK-FC6990 block installed onto card


a CPU block is pure mirror finish job

A close up of PSU


Before with pre installed 140 fan by coolermaster

and after with a big XTX radiator


Positioning of blocks is more or less final


A GPU block and a sound card are very close. Now I understand why ppl worry when going with SLI. This is not a work for ppl with two left hands.:\

A close up to Voltage Regulator Module water block

HDDs are set. 2 Teras should last me for a while. And man am I glad I bought them before the flooding in Thailand. The prices now are outrageous.

I was first thinking positioning a pump right under HDDs, but that would involve some cutting and a case was already painted :whistling:

While I was at it and checked for all the space I thought another radiator would not hurt


And I was not wrong!
..after all the hard work a man needs to cool off. Got a freebie from ek along my order. Nice gesture


A lovely reflection in backplate of work done so far.

Bring on the tube routing!


Continued:
A CPU block had to be reorientated, because tubes are just too close to each other and kinks had to be avoided


You can still spot a small kinks on this pic
 , but that little DCP pump is strong enough to push the flow. Tubes feel more sturdy and inflated once you power it up, hence a good pressure.
Adding a RAM block:


Installing reservoir:
I decided to go with bay reservoir as front of case looks just plain boring.


A final look of tube routing is something like this:


I think blue coolant goes well with blue motherboard's aluminum stock sinks.


And the final product

At this point I would like to thank to Tiborrr@EKWB for great installation hints and to Eddy for making such a great water cooling stuff. Cheers!
I also had a little accident during spray painting of front red mask. I was going for black scheme, but ended up buying a replacement panel.
More photo with front mask on.


UV Ekoolant under LED light.

Overclocking and performance


Zuletzt bearbeitet:

