Willkommen im
Gigabyte (GA-) Z77X-D3H / UD3H / UDH3-WB WIFI / UD5H / UD5H-WB WIFI (Z77) - Sammelthread
xxxInhaltsverzeichnis:
xxxGigabyte GA-Z77X - D3H
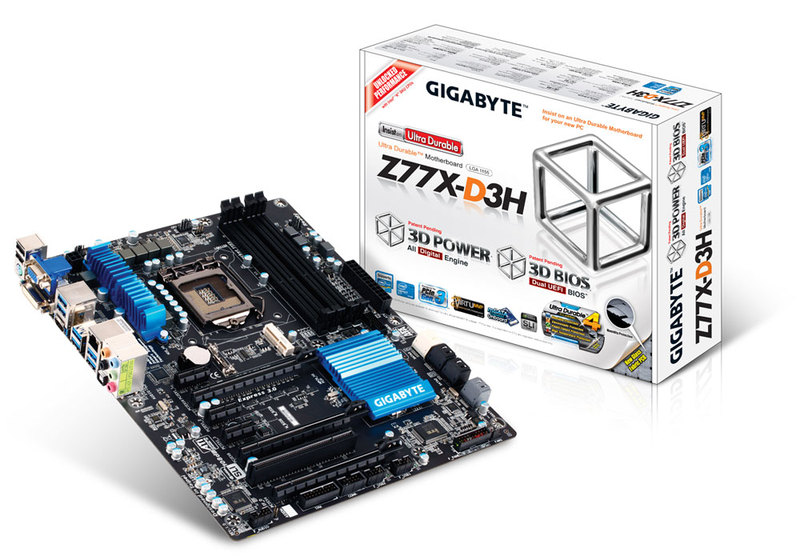
Layout:
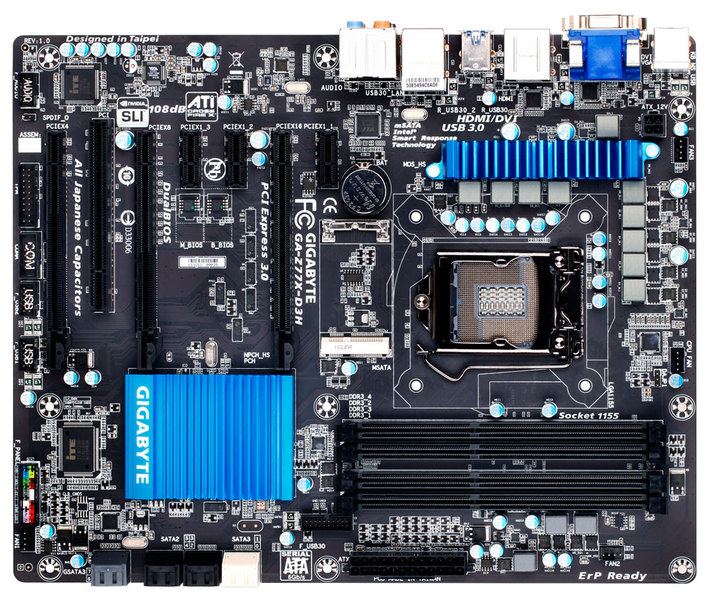
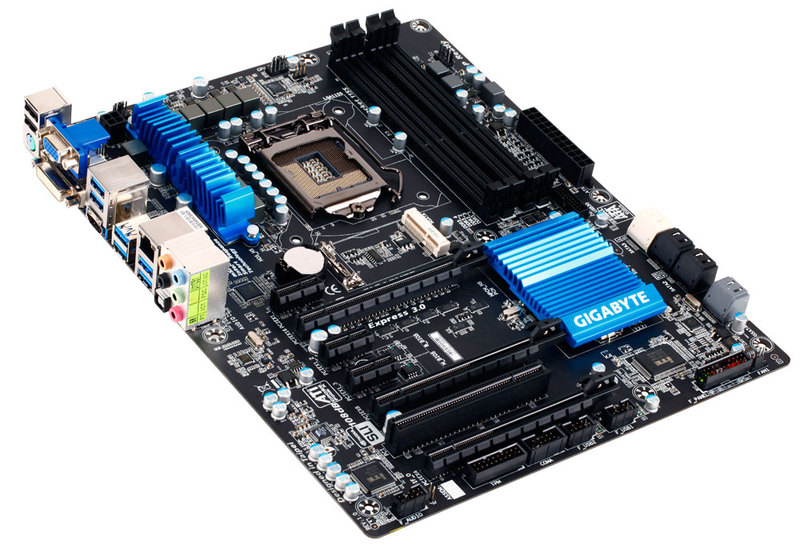
weitere Bilder:
Spezifikationen:
CPU
1.Support for Intel® Core™ i7 processors/Intel® Core™ i5 processors/ Intel® Core™ i3 processors/Intel® Pentium® processors/Intel® Celeron® processors in the LGA1155 package
2.L3 cache varies with CPU
(Please refer "CPU Support List" for more information.)
Chipset
1.Intel® Z77 Express Chipset
Memory
1.4 x 1.5V DDR3 DIMM sockets supporting up to 32 GB of system memory
* Due to Windows 32-bit operating system limitation, when more than 4 GB of physical memory is installed, the actual memory size displayed will be less than 4 GB.
2.Dual channel memory architecture
3.Support for DDR3 1600/1333/1066 MHz memory modules
4.Support for non-ECC memory modules
5.Support for Extreme Memory Profile (XMP) memory modules
(Please refer "Memory Support List" for more information.)
Onboard Graphics
Chipset: 1.1 x D-Sub port
2.1 x DVI-D port, supporting a maximum resolution of 1920x1200
* The DVI-D port does not support D-Sub connection by adapter.
3.1 x HDMI port, supporting a maximum resolution of 1920x1200
Audio
1.VIA VT2021 codec
2.High Definition Audio
3.2/4/5.1/7.1-channel
4.Support for S/PDIF Out
LAN
1.1 x Atheros GbE LAN chip (10/100/1000 Mbit)
Expansion Slots
1.1 x PCI Express x16 slot, running at x16 (PCIEX16)
(The PCIEX16 slot conforms to PCI Express 3.0 standard.)
* For optimum performance, if only one PCI Express graphics card is to be installed, be sure to install it in the PCIEX16 slot.
* The PCI Express x16 slot supports up to PCI Express 2.0 standard when an Intel 32nm (Sandy Bridge) CPU is installed.
2.1 x PCI Express x16 slot, running at x8 (PCIEX8)
* The PCIEX8 slot shares bandwidth with the PCIEX16 slot. When the PCIEX8 slot is populated, the PCIEX16 slot will operate at up to x8 mode.
3.1 x PCI Express x16 slot, running at x4 (PCIEX4)
* The PCIEX4 slot shares bandwidth with the PCIEX1_1/2/3 slots. The PCIEX1_1/2/3 slots slots will become unavailable when a PCIe x4 expansion card is installed.
4.3 x PCI Express x1 slots
(PCIEX8, PCIEX4 and PCIEX1 slots conform to PCI Express 2.0 standard.)
5.1 x PCI slots
Multi-Graphics Technology
1.Support for 2-Way AMD CrossFireX™/NVIDIA SLI technology (PCIEX16 and PCIEX8)
* The PCIEX16 slot operates at up to x8 mode when AMD CrossFireX™/NVIDIA SLI is enabled.
Storage Interface
Chipset: 1.2 x SATA 6Gb/s connectors (SATA3 0/SATA3 1) supporting up to 2 SATA 6Gb/s devices
2.4 x SATA 3Gb/s connectors (SATA2 2~SATA2 5) supporting up to 4 SATA 3Gb/s devices
3.1 x mSATA connector
* The SATA2 5 connector will become unavailable when the mSATA connector is installed with a solid state drive.
4.Support for RAID 0, RAID 1, RAID 5, and RAID 10
* When a RAID set is built across the SATA 6Gb/s and SATA 3Gb/s channels, the system performance of the RAID set may vary depending on the devices being connected.
1 x Marvell 88SE9172 chip: 1.2 x SATA 6Gb/s connectors (GSATA3 6/GSATA3 7) supporting up to 2 SATA 6Gb/s devices
2.Support for RAID 0 and RAID 1
USB
Chipset: 1.Up to 4 USB 3.0/2.0 ports (2 ports on the back panel, 2 ports available through the internal USB headers)
* In Windows XP, the Intel USB 3.0 ports can support up to USB 2.0 transfer speed.
2.Up to 6 USB 2.0/1.1 ports (2 ports on the back panel, 4 ports available through the internal USB headers)
VIA VL800 chip: 1.Up to 4 USB 3.0/2.0 ports on the back panel
* Due to a Windows 7 limitation, please connect your USB device(s) to the USB 2.0/1.1 port(s) before the VIA USB 3.0 controller driver is installed.
Internal I/O Connectors
1.1 x 24-pin ATX main power connector
2.1 x 4-pin ATX 12V power connector
3.4 x SATA 6Gb/s connectors
4.4 x SATA 3Gb/s connectors
5.1 x mSATA connector
6.1 x CPU fan header
7.3 x system fan headers
8.1 x front panel header
9.1 x front panel audio header
10.1 x S/PDIF Out header
11.1 x USB 3.0/2.0 header
12.2 x USB 2.0/1.1 headers
13.1 x serial port header
14.1 x Clear CMOS jumper
15.1 x Trusted Platform Module (TPM) header
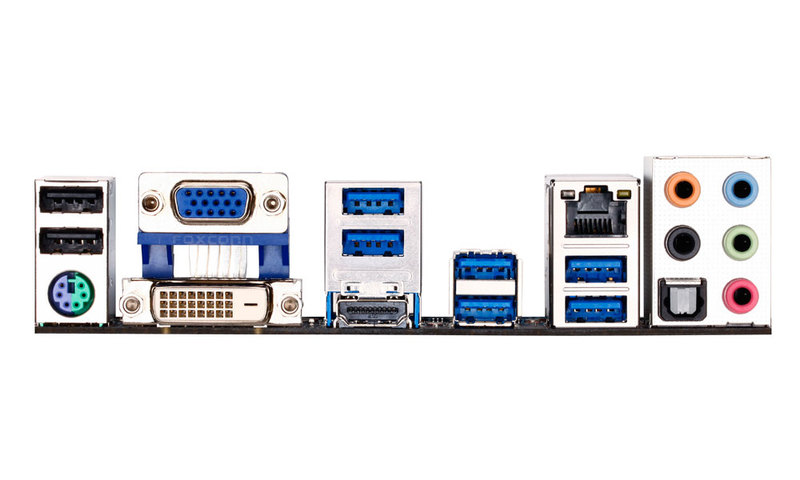
Back Panel Connectors
1.1 x PS/2 keyboard/mouse port
2.1 x D-Sub port
3.1 x DVI-D port
4.1 x HDMI port
5.6 x USB 3.0/2.0 ports
6.2 x USB 2.0/1.1 ports
7.1 x RJ-45 port
8.1 x optical S/PDIF Out connector
9.5 x audio jacks (Center/Subwoofer Speaker Out, Rear Speaker Out, Side Speaker Out, Line In/Mic In, Line Out)
I/O Controller
1.iTE I/O Controller Chip
H/W Monitoring
1.System voltage detection
2.CPU/System temperature detection
3.CPU/System fan speed detection
4.CPU overheating warning
5.CPU/System fan fail warning
6.CPU/System fan speed control
* Whether the CPU/system fan speed control function is supported will depend on the CPU/system cooler you install.
BIOS
1.2 x 64 Mbit flash
2.Use of licensed AMI EFI BIOS
3.Support for DualBIOS™
4.PnP 1.0a, DMI 2.0, SM BIOS 2.6, ACPI 2.0a
Unique Features
1.Support for @BIOS
2.Support for Q-Flash
3.Support for Xpress Install
4.Support for Xpress Recovery2
5.Support for eXtreme Hard Drive (X.H.D)
6.Support for Auto Green
7.Support for ON/OFF Charge
8.Support for Q-Share
9.Support for 3D Power
10.Support for LAN Optimizer (Intelligent optimization network management tool)
Bundle Software
1.Norton Internet Security (OEM version)
2.Intel® Smart Response Technology
3.Intel® Rapid Start Technology
4.LucidLogix Virtu MVP
* Make sure the monitor cable has been connected to the integrated graphics port on the back panel.
Operating System
1.Support for Microsoft® Windows 7/XP
Form Factor
1.ATX Form Factor; 30.5cm x 24.4cm
Remark
1.Due to different Linux support condition provided by chipset vendors, please download Linux driver from chipset vendors' website or 3rd party website.
2.Most hardware/software vendors may no longer offer drivers to support Win9X/ME/2000/XP SP1/SP2. If drivers are available from the vendors, we will update them on the GIGABYTE website.
Links:
- Preisvergleich
- Produktseite / Info beim Hersteller
- Downloads: Bios, Treiber, Handbuch,...
xxxGigabyte GA-Z77X - UD3H
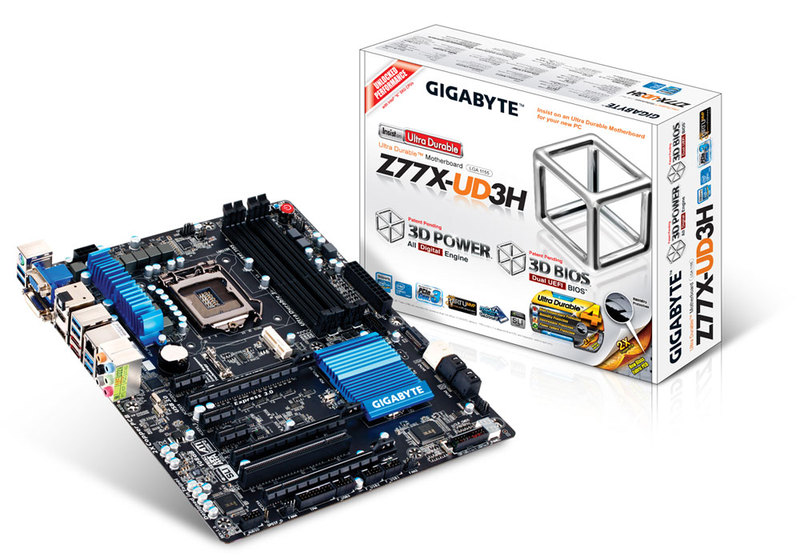
Layout:
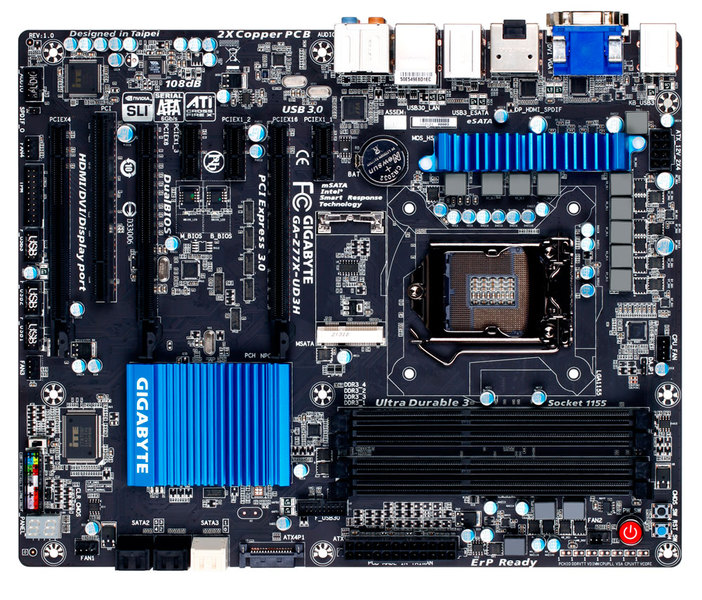
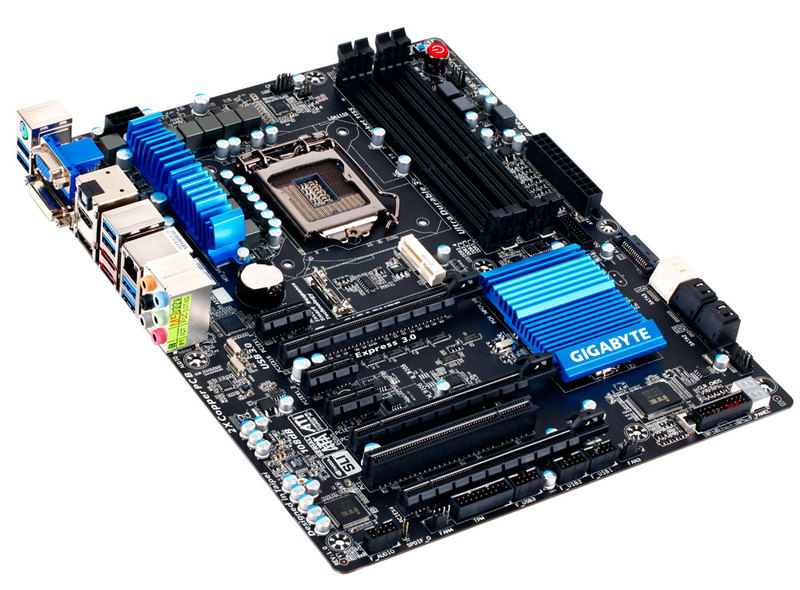
weitere Bilder:
Spezifikationen:
CPU
1.Support for Intel® Core™ i7 processors/Intel® Core™ i5 processors/ Intel® Core™ i3 processors/Intel® Pentium® processors/Intel® Celeron® processors in the LGA1155 package
2.L3 cache varies with CPU
(Please refer "CPU Support List" for more information.)
Chipset
1.Intel® Z77 Express Chipset
Memory
1.4 x 1.5V DDR3 DIMM sockets supporting up to 32 GB of system memory
* Due to Windows 32-bit operating system limitation, when more than 4 GB of physical memory is installed, the actual memory size displayed will be less than 4 GB.
2.Dual channel memory architecture
3.Support for DDR3 1600/1333/1066 MHz memory modules
4.Support for non-ECC memory modules
5.Support for Extreme Memory Profile (XMP) memory modules
(Please refer "Memory Support List" for more information.)
Onboard Graphics
Chipset: 1.1 x D-Sub port
2.1 x DVI-D port, supporting a maximum resolution of 1920x1200
* The DVI-D port does not support D-Sub connection by adapter.
3.1 x HDMI port, supporting a maximum resolution of 1920x1200
4.1 x DisplayPort, supporting a maximum resolution of 2560x1600
Audio
1.VIA VT2021 codec
2.High Definition Audio
3.2/4/5.1/7.1-channel
4.Support for S/PDIF Out
LAN
1.Atheros GbE LAN chip (10/100/1000 Mbit)
Expansion Slots
1.1 x PCI Express x16 slot, running at x16 (PCIEX16)
* For optimum performance, if only one PCI Express graphics card is to be installed, be sure to install it in the PCIEX16 slot.
2.1 x PCI Express x16 slot, running at x8 (PCIEX8)
(The PCIEX16 and PCIEX8 slots conform to PCI Express 3.0 standard.)
* The PCIEX8 slot shares bandwidth with the PCIEX16 slot. When the PCIEX8 slot is populated, the PCIEX16 slot will operate at up to x8 mode.
* The PCI Express x16 slots support up to PCI Express 2.0 standard when an Intel 32nm (Sandy Bridge) CPU is installed.
3.1 x PCI Express x16 slot, running at x4 (PCIEX4)
* The PCIEX4 slot shares bandwidth with all PCI Express x1 slots. All PCI Express x1 slots will become unavailable when a PCIe x4 expansion card is installed.
4.3 x PCI Express x1 slots
(The PCIEX4 and PCI Express x1 slots conform to PCI Express 2.0 standard.)
5.1 x PCI slot
Multi-Graphics Technology
1.Support for 2-Way AMD CrossFireX™/NVIDIA SLI technology (PCIEX16 and PCIEX8)
The PCIEX16 slot operates at up to x8 mode when AMD CrossFireX™/NVIDIA SLI is enabled.
Storage Interface
Chipset: 1.2 x SATA 6Gb/s connectors (SATA3 0/SATA3 1) supporting up to 2 SATA 6Gb/s devices
2.4 x SATA 3Gb/s connectors (SATA2 2~5) supporting up to 4 SATA 3Gb/s devices
3.1 x mSATA connector
* The SATA2 5 connector will become unavailable when the mSATA connector is installed with a solid state drive.
4.Support for RAID 0, RAID 1, RAID 5, and RAID 10
* When a RAID set is built across the SATA 6Gb/s and SATA 3Gb/s channels, the system performance of the RAID set may vary depending on the devices being connected.
Marvell 88SE9172 chip: 1.2 x eSATA 6Gb/s connectors on the back panel supporting up to 2 SATA 6Gb/s devices
2.Support for RAID 0 and RAID 1
USB
Chipset: 1.Up to 4 USB 3.0/2.0 ports (2 ports on the back panel, 2 ports available through the internal USB header)
* In Windows XP, the Intel USB 3.0 ports can support up to USB 2.0 transfer speed.
2.Up to 6 USB 2.0/1.1 ports (available through the internal USB headers)
VIA VL800 chip: 1.Up to 4 USB 3.0/2.0 ports on the back panel
* Due to a Windows 7 limitation, please connect your USB device(s) to the Intel controlled USB port(s) (located below the RJ-45 LAN port) before the VIA USB 3.0 controller driver is installed.
Internal I/O Connectors
1.1 x 24-pin ATX main power connector
2.1 x 8-pin ATX 12V power connector
3.1 x PCIe power connector
4.2 x SATA 6Gb/s connectors
5.4 x SATA 3Gb/s connectors
6.1 x mSATA connector
7.1 x CPU fan header
8.4 x fan headers
9.1 x front panel header
10.1 x front panel audio header
11.1 x S/PDIF Out header
12.3 x USB 2.0/1.1 headers
13.1 x USB 3.0/2.0 header
14.1 x Clear CMOS jumper
15.1 x Trusted Platform Module (TPM) header
16.1 x power button
17.1 x reset button
18.1 x Clear CMOS button
19.1 x Voltage Measurement Points
20.1 x BIOS Switch
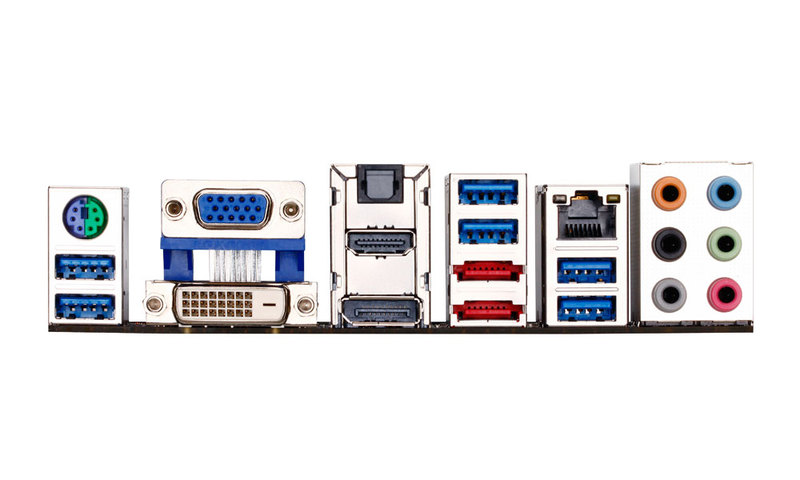
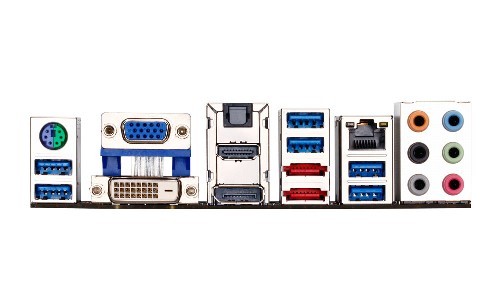
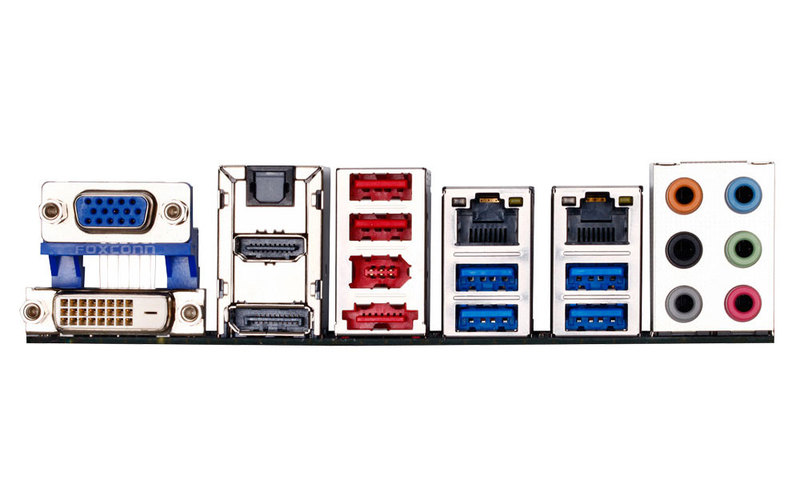
Back Panel Connectors
1.1 x PS/2 keyboard/mouse port
2.1 x D-Sub port
3.1 x DVI-D port
4.1 x optical S/PDIF Out connector
5.1 x HDMI port
6.1 x DisplayPort
7.2 x eSATA 6Gb/s connectors
8.6 x USB 3.0/2.0 ports
9.1 x RJ-45 port
10.6 x audio jacks (Center/Subwoofer Speaker Out, Rear Speaker Out, Side Speaker Out, Line In/Mic In, Line Out)
I/O Controller
1.iTE I/O Controller Chip
H/W Monitoring
1.System voltage detection
2.CPU/System temperature detection
3.CPU/System fan speed detection
4.CPU overheating warning
5.CPU/System fan fail warning
6.CPU/System fan speed control
* Whether the CPU/system fan speed control function is supported will depend on the CPU/system cooler you install.
BIOS
1.2 x 64 Mbit flash
2.Use of licensed AMI EFI BIOS
3.Support for DualBIOS™
4.PnP 1.0a, DMI 2.0, SM BIOS 2.6, ACPI 2.0a
Unique Features
1.Support for @BIOS
2.Support for Q-Flash
3.Support for Xpress Install
4.Support for Xpress Recovery2
5.Support for EasyTune
* Available functions in EasyTune may differ by motherboard model.
6.Support for eXtreme Hard Drive (X.H.D)
7.Support for Auto Green
8.Support for ON/OFF Charge
9.Support for Q-Share
10.Support for 3D Power
11.Support for LAN Optimizer (Intelligent optimization network management tool)
Bundle Software
1.Norton Internet Security (OEM version)
2.Intel® Rapid Start Technology
3.Intel® Smart Connect Technology
4.Intel® Smart Response Technology
5.LucidLogix Virtu MVP
* Make sure the monitor cable has been connected to the integrated graphics port on the back panel.
Operating System
1.Support for Microsoft® Windows 7/XP
Form Factor
1.ATX Form Factor; 30.5cm x 24.4cm
Remark
1.Due to different Linux support condition provided by chipset vendors, please download Linux driver from chipset vendors' website or 3rd party website.
2.Most hardware/software vendors may no longer offer drivers to support Win9X/ME/2000/XP SP1/SP2. If drivers are available from the vendors, we will update them on the GIGABYTE website.
Links:
- Preisvergleich
- Produktseite / Info beim Hersteller
- Downloads: Bios, Treiber, Handbuch,...
xxxGigabyte GA-Z77X - UD3H - WB WIFI
Layout:
weitere Bilder:
Spezifikationen:
CPU
1.Support for Intel® Core™ i7 processors/Intel® Core™ i5 processors/ Intel® Core™ i3 processors/Intel® Pentium® processors/Intel® Celeron® processors in the LGA1155 package
2.L3 cache varies with CPU
(Please refer "CPU Support List" for more information.)
Chipset
1.Intel® Z77 Express Chipset
Memory
1.4 x 1.5V DDR3 DIMM sockets supporting up to 32 GB of system memory
* Due to Windows 32-bit operating system limitation, when more than 4 GB of physical memory is installed, the actual memory size displayed will be less than 4 GB.
2.Dual channel memory architecture
3.Support for DDR3 1600/1333/1066 MHz memory modules
4.Support for non-ECC memory modules
5.Support for Extreme Memory Profile (XMP) memory modules
(Please refer "Memory Support List" for more information.)
Onboard Graphics
Chipset: 1.1 x D-Sub port
2.1 x DVI-D port, supporting a maximum resolution of 1920x1200
* The DVI-D port does not support D-Sub connection by adapter.
3.1 x HDMI port, supporting a maximum resolution of 1920x1200
4.1 x DisplayPort, supporting a maximum resolution of 2560x1600
Audio
1.VIA VT2021 codec
2.High Definition Audio
3.2/4/5.1/7.1-channel
4.Support for S/PDIF Out
LAN
1.Atheros GbE LAN chip (10/100/1000 Mbit)
Expansion Slots
1.1 x PCI Express x16 slot, running at x16 (PCIEX16)
* For optimum performance, if only one PCI Express graphics card is to be installed, be sure to install it in the PCIEX16 slot.
2.1 x PCI Express x16 slot, running at x8 (PCIEX8)
(The PCIEX16 and PCIEX8 slots conform to PCI Express 3.0 standard.)
* The PCIEX8 slot shares bandwidth with the PCIEX16 slot. When the PCIEX8 slot is populated, the PCIEX16 slot will operate at up to x8 mode.
* The PCI Express x16 slots support up to PCI Express 2.0 standard when an Intel 32nm (Sandy Bridge) CPU is installed.
3.1 x PCI Express x16 slot, running at x4 (PCIEX4)
* The PCIEX4 slot shares bandwidth with all PCI Express x1 slots. All PCI Express x1 slots will become unavailable when a PCIe x4 expansion card is installed.
4.3 x PCI Express x1 slots
(The PCIEX4 and PCI Express x1 slots conform to PCI Express 2.0 standard.)
5.1 x PCI slot
Multi-Graphics Technology
1.Support for 2-Way AMD CrossFireX™/NVIDIA SLI technology (PCIEX16 and PCIEX8)
The PCIEX16 slot operates at up to x8 mode when AMD CrossFireX™/NVIDIA SLI is enabled.
Storage Interface
Chipset: 1.2 x SATA 6Gb/s connectors (SATA3 0/SATA3 1) supporting up to 2 SATA 6Gb/s devices
2.4 x SATA 3Gb/s connectors (SATA2 2~5) supporting up to 4 SATA 3Gb/s devices
3.1 x mSATA connector
* The SATA2 5 connector will become unavailable when the mSATA connector is installed with a solid state drive.
4.Support for RAID 0, RAID 1, RAID 5, and RAID 10
* When a RAID set is built across the SATA 6Gb/s and SATA 3Gb/s channels, the system performance of the RAID set may vary depending on the devices being connected.
Marvell 88SE9172 chip: 1.2 x eSATA 6Gb/s connectors on the back panel supporting up to 2 SATA 6Gb/s devices
2.Support for RAID 0 and RAID 1
USB
Chipset: 1.Up to 4 USB 3.0/2.0 ports (2 ports on the back panel, 2 ports available through the internal USB header)
* In Windows XP, the Intel USB 3.0 ports can support up to USB 2.0 transfer speed.
2.Up to 6 USB 2.0/1.1 ports (available through the internal USB headers)
VIA VL800 chip: 1.Up to 4 USB 3.0/2.0 ports on the back panel
* Due to a Windows 7 limitation, please connect your USB device(s) to the Intel controlled USB port(s) (located below the RJ-45 LAN port) before the VIA USB 3.0 controller driver is installed.
Internal I/O Connectors
1.1 x 24-pin ATX main power connector
2.1 x 8-pin ATX 12V power connector
3.1 x PCIe power connector
4.2 x SATA 6Gb/s connectors
5.4 x SATA 3Gb/s connectors
6.1 x mSATA connector
7.1 x CPU fan header
8.4 x fan headers
9.1 x front panel header
10.1 x front panel audio header
11.1 x S/PDIF Out header
12.3 x USB 2.0/1.1 headers
13.1 x USB 3.0/2.0 header
14.1 x Clear CMOS jumper
15.1 x Trusted Platform Module (TPM) header
16.1 x power button
17.1 x reset button
18.1 x Clear CMOS button
19.1 x Voltage Measurement Points
20.1 x BIOS Switch
Back Panel Connectors
1.1 x PS/2 keyboard/mouse port
2.1 x D-Sub port
3.1 x DVI-D port
4.1 x optical S/PDIF Out connector
5.1 x HDMI port
6.1 x DisplayPort
7.2 x eSATA 6Gb/s connectors
8.6 x USB 3.0/2.0 ports
9.1 x RJ-45 port
10.6 x audio jacks (Center/Subwoofer Speaker Out, Rear Speaker Out, Side Speaker Out, Line In/Mic In, Line Out)
I/O Controller
1.iTE I/O Controller Chip
H/W Monitoring
1.System voltage detection
2.CPU/System temperature detection
3.CPU/System fan speed detection
4.CPU overheating warning
5.CPU/System fan fail warning
6.CPU/System fan speed control
* Whether the CPU/system fan speed control function is supported will depend on the CPU/system cooler you install.
BIOS
1.2 x 64 Mbit flash
2.Use of licensed AMI EFI BIOS
3.Support for DualBIOS™
4.PnP 1.0a, DMI 2.0, SM BIOS 2.6, ACPI 2.0a
Unique Features
1.Support for @BIOS
2.Support for Q-Flash
3.Support for Xpress Install
4.Support for Xpress Recovery2
5.Support for EasyTune
* Available functions in EasyTune may differ by motherboard model.
6.Support for eXtreme Hard Drive (X.H.D)
7.Support for Auto Green
8.Support for ON/OFF Charge
9.Support for Q-Share
10.Support for 3D Power
11.Support for LAN Optimizer (Intelligent optimization network management tool)
Bundle Software
1.Norton Internet Security (OEM version)
2.Intel® Rapid Start Technology
3.Intel® Smart Connect Technology
4.Intel® Smart Response Technology
5.LucidLogix Virtu MVP
* Make sure the monitor cable has been connected to the integrated graphics port on the back panel.
Operating System
1.Support for Microsoft® Windows 7/XP
Form Factor
1.ATX Form Factor; 30.5cm x 24.4cm
Remark
1.Due to different Linux support condition provided by chipset vendors, please download Linux driver from chipset vendors' website or 3rd party website.
2.Most hardware/software vendors may no longer offer drivers to support Win9X/ME/2000/XP SP1/SP2. If drivers are available from the vendors, we will update them on the GIGABYTE website.
1.Support for Intel® Core™ i7 processors/Intel® Core™ i5 processors/ Intel® Core™ i3 processors/Intel® Pentium® processors/Intel® Celeron® processors in the LGA1155 package
2.L3 cache varies with CPU
(Please refer "CPU Support List" for more information.)
Chipset
1.Intel® Z77 Express Chipset
Memory
1.4 x 1.5V DDR3 DIMM sockets supporting up to 32 GB of system memory
* Due to Windows 32-bit operating system limitation, when more than 4 GB of physical memory is installed, the actual memory size displayed will be less than 4 GB.
2.Dual channel memory architecture
3.Support for DDR3 1600/1333/1066 MHz memory modules
4.Support for non-ECC memory modules
5.Support for Extreme Memory Profile (XMP) memory modules
(Please refer "Memory Support List" for more information.)
Onboard Graphics
Chipset: 1.1 x D-Sub port
2.1 x DVI-D port, supporting a maximum resolution of 1920x1200
* The DVI-D port does not support D-Sub connection by adapter.
3.1 x HDMI port, supporting a maximum resolution of 1920x1200
4.1 x DisplayPort, supporting a maximum resolution of 2560x1600
Audio
1.VIA VT2021 codec
2.High Definition Audio
3.2/4/5.1/7.1-channel
4.Support for S/PDIF Out
LAN
1.Atheros GbE LAN chip (10/100/1000 Mbit)
Expansion Slots
1.1 x PCI Express x16 slot, running at x16 (PCIEX16)
* For optimum performance, if only one PCI Express graphics card is to be installed, be sure to install it in the PCIEX16 slot.
2.1 x PCI Express x16 slot, running at x8 (PCIEX8)
(The PCIEX16 and PCIEX8 slots conform to PCI Express 3.0 standard.)
* The PCIEX8 slot shares bandwidth with the PCIEX16 slot. When the PCIEX8 slot is populated, the PCIEX16 slot will operate at up to x8 mode.
* The PCI Express x16 slots support up to PCI Express 2.0 standard when an Intel 32nm (Sandy Bridge) CPU is installed.
3.1 x PCI Express x16 slot, running at x4 (PCIEX4)
* The PCIEX4 slot shares bandwidth with all PCI Express x1 slots. All PCI Express x1 slots will become unavailable when a PCIe x4 expansion card is installed.
4.3 x PCI Express x1 slots
(The PCIEX4 and PCI Express x1 slots conform to PCI Express 2.0 standard.)
5.1 x PCI slot
Multi-Graphics Technology
1.Support for 2-Way AMD CrossFireX™/NVIDIA SLI technology (PCIEX16 and PCIEX8)
The PCIEX16 slot operates at up to x8 mode when AMD CrossFireX™/NVIDIA SLI is enabled.
Storage Interface
Chipset: 1.2 x SATA 6Gb/s connectors (SATA3 0/SATA3 1) supporting up to 2 SATA 6Gb/s devices
2.4 x SATA 3Gb/s connectors (SATA2 2~5) supporting up to 4 SATA 3Gb/s devices
3.1 x mSATA connector
* The SATA2 5 connector will become unavailable when the mSATA connector is installed with a solid state drive.
4.Support for RAID 0, RAID 1, RAID 5, and RAID 10
* When a RAID set is built across the SATA 6Gb/s and SATA 3Gb/s channels, the system performance of the RAID set may vary depending on the devices being connected.
Marvell 88SE9172 chip: 1.2 x eSATA 6Gb/s connectors on the back panel supporting up to 2 SATA 6Gb/s devices
2.Support for RAID 0 and RAID 1
USB
Chipset: 1.Up to 4 USB 3.0/2.0 ports (2 ports on the back panel, 2 ports available through the internal USB header)
* In Windows XP, the Intel USB 3.0 ports can support up to USB 2.0 transfer speed.
2.Up to 6 USB 2.0/1.1 ports (available through the internal USB headers)
VIA VL800 chip: 1.Up to 4 USB 3.0/2.0 ports on the back panel
* Due to a Windows 7 limitation, please connect your USB device(s) to the Intel controlled USB port(s) (located below the RJ-45 LAN port) before the VIA USB 3.0 controller driver is installed.
Internal I/O Connectors
1.1 x 24-pin ATX main power connector
2.1 x 8-pin ATX 12V power connector
3.1 x PCIe power connector
4.2 x SATA 6Gb/s connectors
5.4 x SATA 3Gb/s connectors
6.1 x mSATA connector
7.1 x CPU fan header
8.4 x fan headers
9.1 x front panel header
10.1 x front panel audio header
11.1 x S/PDIF Out header
12.3 x USB 2.0/1.1 headers
13.1 x USB 3.0/2.0 header
14.1 x Clear CMOS jumper
15.1 x Trusted Platform Module (TPM) header
16.1 x power button
17.1 x reset button
18.1 x Clear CMOS button
19.1 x Voltage Measurement Points
20.1 x BIOS Switch
Back Panel Connectors
1.1 x PS/2 keyboard/mouse port
2.1 x D-Sub port
3.1 x DVI-D port
4.1 x optical S/PDIF Out connector
5.1 x HDMI port
6.1 x DisplayPort
7.2 x eSATA 6Gb/s connectors
8.6 x USB 3.0/2.0 ports
9.1 x RJ-45 port
10.6 x audio jacks (Center/Subwoofer Speaker Out, Rear Speaker Out, Side Speaker Out, Line In/Mic In, Line Out)
I/O Controller
1.iTE I/O Controller Chip
H/W Monitoring
1.System voltage detection
2.CPU/System temperature detection
3.CPU/System fan speed detection
4.CPU overheating warning
5.CPU/System fan fail warning
6.CPU/System fan speed control
* Whether the CPU/system fan speed control function is supported will depend on the CPU/system cooler you install.
BIOS
1.2 x 64 Mbit flash
2.Use of licensed AMI EFI BIOS
3.Support for DualBIOS™
4.PnP 1.0a, DMI 2.0, SM BIOS 2.6, ACPI 2.0a
Unique Features
1.Support for @BIOS
2.Support for Q-Flash
3.Support for Xpress Install
4.Support for Xpress Recovery2
5.Support for EasyTune
* Available functions in EasyTune may differ by motherboard model.
6.Support for eXtreme Hard Drive (X.H.D)
7.Support for Auto Green
8.Support for ON/OFF Charge
9.Support for Q-Share
10.Support for 3D Power
11.Support for LAN Optimizer (Intelligent optimization network management tool)
Bundle Software
1.Norton Internet Security (OEM version)
2.Intel® Rapid Start Technology
3.Intel® Smart Connect Technology
4.Intel® Smart Response Technology
5.LucidLogix Virtu MVP
* Make sure the monitor cable has been connected to the integrated graphics port on the back panel.
Operating System
1.Support for Microsoft® Windows 7/XP
Form Factor
1.ATX Form Factor; 30.5cm x 24.4cm
Remark
1.Due to different Linux support condition provided by chipset vendors, please download Linux driver from chipset vendors' website or 3rd party website.
2.Most hardware/software vendors may no longer offer drivers to support Win9X/ME/2000/XP SP1/SP2. If drivers are available from the vendors, we will update them on the GIGABYTE website.
Links:
- Preisvergleich
- Produktseite / Info beim Hersteller
- Downloads: Bios, Treiber, Handbuch,...
xxxGigabyte GA-Z77X - UD5H
Layout:
weitere Bilder:
Spezifikationen:
CPU
1.Support for Intel® Core™ i7 processors/Intel® Core™ i5 processors/ Intel® Core™ i3 processors/Intel® Pentium® processors/Intel® Celeron® processors in the LGA1155 package
2.L3 cache varies with CPU
(Please refer "CPU Support List" for more information.)
Chipset
1.Intel® Z77 Express Chipset
Memory
1.4 x 1.5V DDR3 DIMM sockets supporting up to 32 GB of system memory
* Due to Windows 32-bit operating system limitation, when more than 4 GB of physical memory is installed, the actual memory size displayed will be less than 4 GB.
2.Dual channel memory architecture
3.Support for DDR3 1600/1333/1066 MHz memory modules
4.Support for non-ECC memory modules
5.Support for Extreme Memory Profile (XMP) memory modules
(Please refer "Memory Support List" for more information.)
Onboard Graphics
Chipset: 1.1 x D-Sub port
2.1 x DVI-D port, supporting a maximum resolution of 1920x1200
* The DVI-D port does not support D-Sub connection by adapter.
3.1 x HDMI port, supporting a maximum resolution of 1920x1200
4.1 x DisplayPort, supporting a maximum resolution of 2560x1600p
Audio
1.Realtek ALC898 codec
2.Support for X-Fi Xtreme Fidelity® and EAX® Advanced HD™ 5.0 technologies
3.High Definition Audio
4.2/4/5.1/7.1-channel
5.Support for S/PDIF Out
LAN
1.1 x Atheros GbE LAN chip (10/100/1000 Mbit) (LAN1)
2.1 x Intel GbE LAN chip (10/100/1000 Mbit) (LAN2)
Expansion Slots
1.1 x PCI Express x16 slot, running at x16 (PCIEX16)
* For optimum performance, if only one PCI Express graphics card is to be installed, be sure to install it in the PCIEX16 slot.
* The PCI Express x16 slot supports up to PCI Express 2.0 standard when an Intel 32nm (Sandy Bridge) CPU is installed.
2.1 x PCI Express x16 slot, running at x8 (PCIEX8)
* The PCIEX8 slot shares bandwidth with the PCIEX16 slot. When the PCIEX8 slot is populated, the PCIEX16 slot will operate at up to x8 mode.
3.1 x PCI Express x16 slot, running at x4 (PCIEX4)
* The PCIEX4 slot is available only when an Intel 22nm CPU is installed.
* The PCIEX4 slot shares bandwidth with the PCIEX8 and PCIEX16 slots. When the PCIEX4 slot is populated, the PCIEX16 slot will operate at up to x8 mode and the PCIEX8 will operate at up to x4 mode.
(The PCIEX16, PCIEX8 and PCIEX4 slots conform to PCI Express 3.0 standard.)
4.3 x PCI Express x1 slots
(All PCI Express x1 slots conform to PCI Express 2.0 standard.)
5.1 x PCI slot
Multi-Graphics Technology
1.Support for AMD CrossFireX™ / NVIDIA SLI technology
Storage Interface
Chipset: 1.2 x SATA 6Gb/s connectors (SATA3 0/SATA3 1) supporting up to 2 SATA 6Gb/s devices
2.4 x SATA 3Gb/s connectors (SATA2 2~5) supporting up to 4 SATA 3Gb/s devices
3.1 x mSATA connector
* The SATA2 5 connector will become unavailable when the mSATA connector is installed with a solid state drive.
4.Support for RAID 0, RAID 1, RAID 5, and RAID 10
* When a RAID set is built across the SATA 6Gb/s and SATA 3Gb/s channels, the system performance of the RAID set may vary depending on the devices being connected.
2 x Marvell 88SE9172 chips: 1.3 x SATA 6Gb/s connectors (GSATA3 6/7/8) supporting up to 3 SATA 6Gb/s devices
2.1 x eSATA 6Gb/s connector on the back panel supporting up to 1 SATA 6Gb/s device
3.Support for RAID 0 and RAID 1
USB
Chipset: 1.Up to 2 USB 3.0/2.0 ports (available through the internal USB headers)
2.Up to 6 USB 2.0/1.1 ports (2 ports on the back panel, 4 ports available through the internal USB headers)
Chipset + 2 VIA VL810 Hubs: 1.Up to 8 USB 3.0/2.0 ports (4 ports on the back panel, 4 ports available through the internal USB headers)
* In Windows XP, the Intel USB 3.0 ports and VIA VL810 HUB can support up to USB 2.0 transfer speed.
* Due to a Windows 7 limitation, please connect your USB device(s) to the USB 2.0/1.1 port(s) before the Intel USB 3.0 controller driver is installed.
IEEE 1394
VIA VT6308 chip: 1.Up to 2 IEEE 1394a ports (1 port on the back panel, 1 port available through the internal IEEE 1394a header)
Internal I/O Connectors
1.1 x 24-pin ATX main power connector
2.1 x 8-pin ATX 12V power connector
3.1 x PCIe power connector
4.5 x SATA 6Gb/s connectors
5.4 x SATA 3Gb/s connectors
6.1 x mSATA connector
7.1 x CPU fan header
8.4 x system fan headers
9.1 x front panel header
10.1 x front panel audio header
11.1 x S/PDIF Out header
12.3 x USB 3.0/2.0 headers
13.2 x USB 2.0/1.1 headers
14.1 x Clear CMOS jumper
15.1 x Trusted Platform Module (TPM) header
16.1 x power button
17.1 x reset button
18.1 x Clear CMOS button
19.1 x heatsink LED power connector
20.1 x BIOS Switch
21.Voltage Measurement Points
Back Panel Connectors
1.1 x D-Sub port
2.1 x DVI-D port
3.1 x optical S/PDIF Out connector
4.1 x HDMI port
5.1 x DisplayPort
6.1 x eSATA 6Gb/s connector
7.4 x USB 3.0/2.0 ports
8.2 x USB 2.0/1.0 ports
9.1 x IEEE 1394a port
10.2 x RJ-45 ports
11.6 x audio jacks (Center/Subwoofer Speaker Out, Rear Speaker Out, Side Speaker Out, Line In/Mic In, Line Out)
I/O Controller
1.iTE I/O Controller Chip
H/W Monitoring
1.System voltage detection
2.CPU/System temperature detection
3.CPU/System fan speed detection
4.CPU overheating warning
5.CPU/System fan fail warning
6.CPU/System fan speed control
* Whether the CPU/system fan speed control function is supported will depend on the CPU/system cooler you install.
BIOS
1.2 x 64 Mbit flash
2.Use of licensed AMI EFI BIOS
3.Support for DualBIOS™
4.PnP 1.0a, DMI 2.0, SM BIOS 2.6, ACPI 2.0a
Unique Features
1.Support for @BIOS
2.Support for Q-Flash
3.Support for Xpress Install
4.Support for Xpress Recovery2
5.Support for eXtreme Hard Drive (X.H.D)
6.Support for Auto Green
7.Support for ON/OFF Charge
8.Support for Q-Share
9.Support for 3D Power
10.Support for LAN Optimizer (Intelligent optimization network management tool)
Bundle Software
1.Norton Internet Security (OEM version)
2.Intel® Rapid Start Technology
3.Intel® Smart Connect Technology
4.Intel® Smart Response Technology
5.LucidLogix Virtu MVP
* Make sure the monitor cable has been connected to the integrated graphics port on the back panel.
Operating System
1.Support for Microsoft® Windows 7/XP
Form Factor
1.ATX Form Factor; 30.5cm x 24.4cm
Remark
1.Due to different Linux support condition provided by chipset vendors, please download Linux driver from chipset vendors' website or 3rd party website.
2.Most hardware/software vendors may no longer offer drivers to support Win9X/ME/2000/XP SP1/SP2. If drivers are available from the vendors, we will update them on the GIGABYTE website.
Links:
- Preisvergleich
- Produktseite / Info beim Hersteller
- Downloads: Bios, Treiber, Handbuch,...
xxxGigabyte GA-Z77X - UD5H - WB WIFI
Layout:
weitere Bilder:
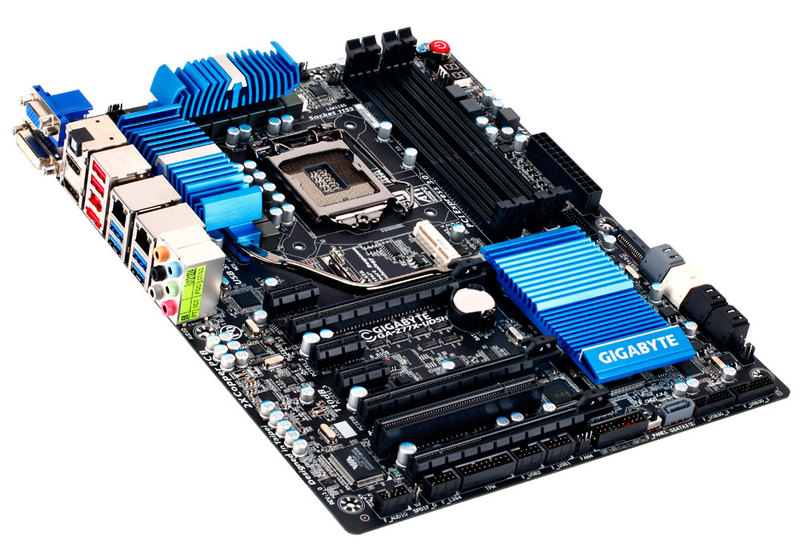
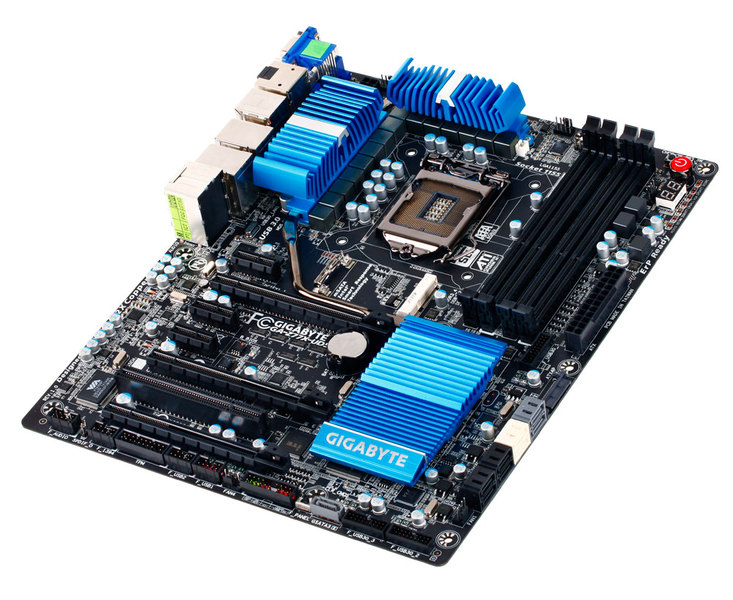
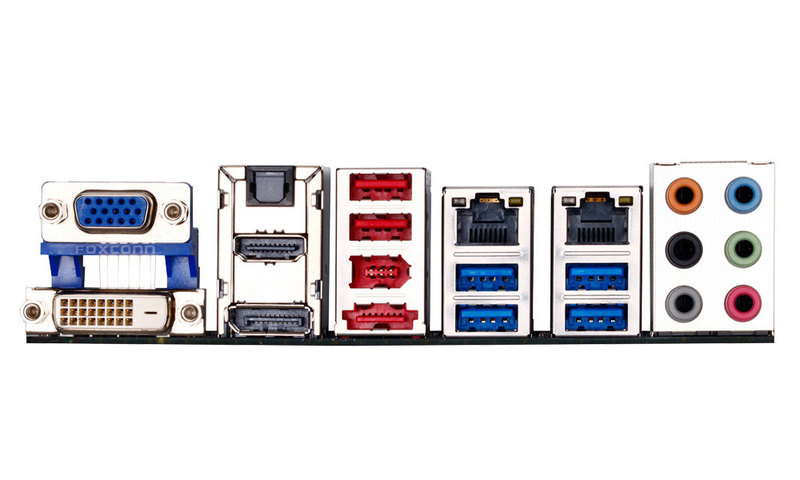
Spezifikationen:
CPU
1.Support for Intel® Core™ i7 processors/Intel® Core™ i5 processors/ Intel® Core™ i3 processors/Intel® Pentium® processors/Intel® Celeron® processors in the LGA1155 package
2.L3 cache varies with CPU
(Please refer "CPU Support List" for more information.)
Chipset
1.Intel® Z77 Express Chipset
Memory
1.4 x 1.5V DDR3 DIMM sockets supporting up to 32 GB of system memory
* Due to Windows 32-bit operating system limitation, when more than 4 GB of physical memory is installed, the actual memory size displayed will be less than 4 GB.
2.Dual channel memory architecture
3.Support for DDR3 1600/1333/1066 MHz memory modules
4.Support for non-ECC memory modules
5.Support for Extreme Memory Profile (XMP) memory modules
(Please refer "Memory Support List" for more information.)
Onboard Graphics
Chipset: 1.1 x D-Sub port
2.1 x DVI-D port, supporting a maximum resolution of 1920x1200
* The DVI-D port does not support D-Sub connection by adapter.
3.1 x HDMI port, supporting a maximum resolution of 1920x1200
4.1 x DisplayPort, supporting a maximum resolution of 2560x1600p
Audio
1.Realtek ALC898 codec
2.Support for X-Fi Xtreme Fidelity® and EAX® Advanced HD™ 5.0 technologies
3.High Definition Audio
4.2/4/5.1/7.1-channel
5.Support for S/PDIF Out
LAN
1.1 x Atheros GbE LAN chip (10/100/1000 Mbit) (LAN1)
2.1 x Intel GbE LAN chip (10/100/1000 Mbit) (LAN2)
Expansion Slots
1.1 x PCI Express x16 slot, running at x16 (PCIEX16)
* For optimum performance, if only one PCI Express graphics card is to be installed, be sure to install it in the PCIEX16 slot.
* The PCI Express x16 slot supports up to PCI Express 2.0 standard when an Intel 32nm (Sandy Bridge) CPU is installed.
2.1 x PCI Express x16 slot, running at x8 (PCIEX8)
* The PCIEX8 slot shares bandwidth with the PCIEX16 slot. When the PCIEX8 slot is populated, the PCIEX16 slot will operate at up to x8 mode.
3.1 x PCI Express x16 slot, running at x4 (PCIEX4)
* The PCIEX4 slot is available only when an Intel 22nm CPU is installed.
* The PCIEX4 slot shares bandwidth with the PCIEX8 and PCIEX16 slots. When the PCIEX4 slot is populated, the PCIEX16 slot will operate at up to x8 mode and the PCIEX8 will operate at up to x4 mode.
(The PCIEX16, PCIEX8 and PCIEX4 slots conform to PCI Express 3.0 standard.)
4.3 x PCI Express x1 slots
(All PCI Express x1 slots conform to PCI Express 2.0 standard.)
5.1 x PCI slot
Multi-Graphics Technology
1.Support for AMD CrossFireX™ / NVIDIA SLI technology
Storage Interface
Chipset: 1.2 x SATA 6Gb/s connectors (SATA3 0/SATA3 1) supporting up to 2 SATA 6Gb/s devices
2.4 x SATA 3Gb/s connectors (SATA2 2~5) supporting up to 4 SATA 3Gb/s devices
3.1 x mSATA connector
* The SATA2 5 connector will become unavailable when the mSATA connector is installed with a solid state drive.
4.Support for RAID 0, RAID 1, RAID 5, and RAID 10
* When a RAID set is built across the SATA 6Gb/s and SATA 3Gb/s channels, the system performance of the RAID set may vary depending on the devices being connected.
2 x Marvell 88SE9172 chips: 1.3 x SATA 6Gb/s connectors (GSATA3 6/7/8) supporting up to 3 SATA 6Gb/s devices
2.1 x eSATA 6Gb/s connector on the back panel supporting up to 1 SATA 6Gb/s device
3.Support for RAID 0 and RAID 1
USB
Chipset: 1.Up to 2 USB 3.0/2.0 ports (available through the internal USB headers)
2.Up to 6 USB 2.0/1.1 ports (2 ports on the back panel, 4 ports available through the internal USB headers)
Chipset + 2 VIA VL810 Hubs: 1.Up to 8 USB 3.0/2.0 ports (4 ports on the back panel, 4 ports available through the internal USB headers)
* In Windows XP, the Intel USB 3.0 ports and VIA VL810 HUB can support up to USB 2.0 transfer speed.
* Due to a Windows 7 limitation, please connect your USB device(s) to the USB 2.0/1.1 port(s) before the Intel USB 3.0 controller driver is installed.
IEEE 1394
VIA VT6308 chip: 1.Up to 2 IEEE 1394a ports (1 port on the back panel, 1 port available through the internal IEEE 1394a header)
Internal I/O Connectors
1.1 x 24-pin ATX main power connector
2.1 x 8-pin ATX 12V power connector
3.1 x PCIe power connector
4.5 x SATA 6Gb/s connectors
5.4 x SATA 3Gb/s connectors
6.1 x mSATA connector
7.1 x CPU fan header
8.4 x system fan headers
9.1 x front panel header
10.1 x front panel audio header
11.1 x S/PDIF Out header
12.3 x USB 3.0/2.0 headers
13.2 x USB 2.0/1.1 headers
14.1 x Clear CMOS jumper
15.1 x Trusted Platform Module (TPM) header
16.1 x power button
17.1 x reset button
18.1 x Clear CMOS button
19.1 x heatsink LED power connector
20.1 x BIOS Switch
21.Voltage Measurement Points
Back Panel Connectors
1.1 x D-Sub port
2.1 x DVI-D port
3.1 x optical S/PDIF Out connector
4.1 x HDMI port
5.1 x DisplayPort
6.1 x eSATA 6Gb/s connector
7.4 x USB 3.0/2.0 ports
8.2 x USB 2.0/1.0 ports
9.1 x IEEE 1394a port
10.2 x RJ-45 ports
11.6 x audio jacks (Center/Subwoofer Speaker Out, Rear Speaker Out, Side Speaker Out, Line In/Mic In, Line Out)
I/O Controller
1.iTE I/O Controller Chip
H/W Monitoring
1.System voltage detection
2.CPU/System temperature detection
3.CPU/System fan speed detection
4.CPU overheating warning
5.CPU/System fan fail warning
6.CPU/System fan speed control
* Whether the CPU/system fan speed control function is supported will depend on the CPU/system cooler you install.
BIOS
1.2 x 64 Mbit flash
2.Use of licensed AMI EFI BIOS
3.Support for DualBIOS™
4.PnP 1.0a, DMI 2.0, SM BIOS 2.6, ACPI 2.0a
Unique Features
1.Support for @BIOS
2.Support for Q-Flash
3.Support for Xpress Install
4.Support for Xpress Recovery2
5.Support for eXtreme Hard Drive (X.H.D)
6.Support for Auto Green
7.Support for ON/OFF Charge
8.Support for Q-Share
9.Support for 3D Power
10.Support for LAN Optimizer (Intelligent optimization network management tool)
Bundle Software
1.Norton Internet Security (OEM version)
2.Intel® Rapid Start Technology
3.Intel® Smart Connect Technology
4.Intel® Smart Response Technology
5.LucidLogix Virtu MVP
* Make sure the monitor cable has been connected to the integrated graphics port on the back panel.
Operating System
1.Support for Microsoft® Windows 7/XP
Form Factor
1.ATX Form Factor; 30.5cm x 24.4cm
Remark
1.Due to different Linux support condition provided by chipset vendors, please download Linux driver from chipset vendors' website or 3rd party website.
2.Most hardware/software vendors may no longer offer drivers to support Win9X/ME/2000/XP SP1/SP2. If drivers are available from the vendors, we will update them on the GIGABYTE website.
1.Support for Intel® Core™ i7 processors/Intel® Core™ i5 processors/ Intel® Core™ i3 processors/Intel® Pentium® processors/Intel® Celeron® processors in the LGA1155 package
2.L3 cache varies with CPU
(Please refer "CPU Support List" for more information.)
Chipset
1.Intel® Z77 Express Chipset
Memory
1.4 x 1.5V DDR3 DIMM sockets supporting up to 32 GB of system memory
* Due to Windows 32-bit operating system limitation, when more than 4 GB of physical memory is installed, the actual memory size displayed will be less than 4 GB.
2.Dual channel memory architecture
3.Support for DDR3 1600/1333/1066 MHz memory modules
4.Support for non-ECC memory modules
5.Support for Extreme Memory Profile (XMP) memory modules
(Please refer "Memory Support List" for more information.)
Onboard Graphics
Chipset: 1.1 x D-Sub port
2.1 x DVI-D port, supporting a maximum resolution of 1920x1200
* The DVI-D port does not support D-Sub connection by adapter.
3.1 x HDMI port, supporting a maximum resolution of 1920x1200
4.1 x DisplayPort, supporting a maximum resolution of 2560x1600p
Audio
1.Realtek ALC898 codec
2.Support for X-Fi Xtreme Fidelity® and EAX® Advanced HD™ 5.0 technologies
3.High Definition Audio
4.2/4/5.1/7.1-channel
5.Support for S/PDIF Out
LAN
1.1 x Atheros GbE LAN chip (10/100/1000 Mbit) (LAN1)
2.1 x Intel GbE LAN chip (10/100/1000 Mbit) (LAN2)
Expansion Slots
1.1 x PCI Express x16 slot, running at x16 (PCIEX16)
* For optimum performance, if only one PCI Express graphics card is to be installed, be sure to install it in the PCIEX16 slot.
* The PCI Express x16 slot supports up to PCI Express 2.0 standard when an Intel 32nm (Sandy Bridge) CPU is installed.
2.1 x PCI Express x16 slot, running at x8 (PCIEX8)
* The PCIEX8 slot shares bandwidth with the PCIEX16 slot. When the PCIEX8 slot is populated, the PCIEX16 slot will operate at up to x8 mode.
3.1 x PCI Express x16 slot, running at x4 (PCIEX4)
* The PCIEX4 slot is available only when an Intel 22nm CPU is installed.
* The PCIEX4 slot shares bandwidth with the PCIEX8 and PCIEX16 slots. When the PCIEX4 slot is populated, the PCIEX16 slot will operate at up to x8 mode and the PCIEX8 will operate at up to x4 mode.
(The PCIEX16, PCIEX8 and PCIEX4 slots conform to PCI Express 3.0 standard.)
4.3 x PCI Express x1 slots
(All PCI Express x1 slots conform to PCI Express 2.0 standard.)
5.1 x PCI slot
Multi-Graphics Technology
1.Support for AMD CrossFireX™ / NVIDIA SLI technology
Storage Interface
Chipset: 1.2 x SATA 6Gb/s connectors (SATA3 0/SATA3 1) supporting up to 2 SATA 6Gb/s devices
2.4 x SATA 3Gb/s connectors (SATA2 2~5) supporting up to 4 SATA 3Gb/s devices
3.1 x mSATA connector
* The SATA2 5 connector will become unavailable when the mSATA connector is installed with a solid state drive.
4.Support for RAID 0, RAID 1, RAID 5, and RAID 10
* When a RAID set is built across the SATA 6Gb/s and SATA 3Gb/s channels, the system performance of the RAID set may vary depending on the devices being connected.
2 x Marvell 88SE9172 chips: 1.3 x SATA 6Gb/s connectors (GSATA3 6/7/8) supporting up to 3 SATA 6Gb/s devices
2.1 x eSATA 6Gb/s connector on the back panel supporting up to 1 SATA 6Gb/s device
3.Support for RAID 0 and RAID 1
USB
Chipset: 1.Up to 2 USB 3.0/2.0 ports (available through the internal USB headers)
2.Up to 6 USB 2.0/1.1 ports (2 ports on the back panel, 4 ports available through the internal USB headers)
Chipset + 2 VIA VL810 Hubs: 1.Up to 8 USB 3.0/2.0 ports (4 ports on the back panel, 4 ports available through the internal USB headers)
* In Windows XP, the Intel USB 3.0 ports and VIA VL810 HUB can support up to USB 2.0 transfer speed.
* Due to a Windows 7 limitation, please connect your USB device(s) to the USB 2.0/1.1 port(s) before the Intel USB 3.0 controller driver is installed.
IEEE 1394
VIA VT6308 chip: 1.Up to 2 IEEE 1394a ports (1 port on the back panel, 1 port available through the internal IEEE 1394a header)
Internal I/O Connectors
1.1 x 24-pin ATX main power connector
2.1 x 8-pin ATX 12V power connector
3.1 x PCIe power connector
4.5 x SATA 6Gb/s connectors
5.4 x SATA 3Gb/s connectors
6.1 x mSATA connector
7.1 x CPU fan header
8.4 x system fan headers
9.1 x front panel header
10.1 x front panel audio header
11.1 x S/PDIF Out header
12.3 x USB 3.0/2.0 headers
13.2 x USB 2.0/1.1 headers
14.1 x Clear CMOS jumper
15.1 x Trusted Platform Module (TPM) header
16.1 x power button
17.1 x reset button
18.1 x Clear CMOS button
19.1 x heatsink LED power connector
20.1 x BIOS Switch
21.Voltage Measurement Points
Back Panel Connectors
1.1 x D-Sub port
2.1 x DVI-D port
3.1 x optical S/PDIF Out connector
4.1 x HDMI port
5.1 x DisplayPort
6.1 x eSATA 6Gb/s connector
7.4 x USB 3.0/2.0 ports
8.2 x USB 2.0/1.0 ports
9.1 x IEEE 1394a port
10.2 x RJ-45 ports
11.6 x audio jacks (Center/Subwoofer Speaker Out, Rear Speaker Out, Side Speaker Out, Line In/Mic In, Line Out)
I/O Controller
1.iTE I/O Controller Chip
H/W Monitoring
1.System voltage detection
2.CPU/System temperature detection
3.CPU/System fan speed detection
4.CPU overheating warning
5.CPU/System fan fail warning
6.CPU/System fan speed control
* Whether the CPU/system fan speed control function is supported will depend on the CPU/system cooler you install.
BIOS
1.2 x 64 Mbit flash
2.Use of licensed AMI EFI BIOS
3.Support for DualBIOS™
4.PnP 1.0a, DMI 2.0, SM BIOS 2.6, ACPI 2.0a
Unique Features
1.Support for @BIOS
2.Support for Q-Flash
3.Support for Xpress Install
4.Support for Xpress Recovery2
5.Support for eXtreme Hard Drive (X.H.D)
6.Support for Auto Green
7.Support for ON/OFF Charge
8.Support for Q-Share
9.Support for 3D Power
10.Support for LAN Optimizer (Intelligent optimization network management tool)
Bundle Software
1.Norton Internet Security (OEM version)
2.Intel® Rapid Start Technology
3.Intel® Smart Connect Technology
4.Intel® Smart Response Technology
5.LucidLogix Virtu MVP
* Make sure the monitor cable has been connected to the integrated graphics port on the back panel.
Operating System
1.Support for Microsoft® Windows 7/XP
Form Factor
1.ATX Form Factor; 30.5cm x 24.4cm
Remark
1.Due to different Linux support condition provided by chipset vendors, please download Linux driver from chipset vendors' website or 3rd party website.
2.Most hardware/software vendors may no longer offer drivers to support Win9X/ME/2000/XP SP1/SP2. If drivers are available from the vendors, we will update them on the GIGABYTE website.
Links:
- Preisvergleich
- Produktseite / Info beim Hersteller
- Downloads: Bios, Treiber, Handbuch,...
xxxWeitere Infos und nützliche Links:
Infos:
Per Software (Speedfan) regelbare Lüfteranschlüsse: (über ITE IT8728)
Sys_Fan1: Ja
Sys_Fan2: Nein
Sys_Fan3: Nein
Sys_Fan4: Nein
CPU_Fan: Ja
------------------------------------------------------------
Links:
- Gigabyte Z77 motherboards shown off at CES
- Die offiziellen Z77 Pressenews aus dem Gigabyte Forum
- GIGABYTE CeBIT 2012 Highlight

xxxKompatibilität Arbeitsspeicher:
Speicherliste:
kompatibel:
- 2*2GB
***
- 2*4GB
- Corsair Vengeance schwarz DIMM Kit 8GB PC3-12800U CL9-9-9-24 (DDR3-1600) (CMZ8GX3M2A1600C9)
- Corsair Vengeance Low Profile schwarz DIMM Kit 8GB PC3-12800U CL9-9-9-24 (DDR3-1600) (CML8GX3M2A1600C9)
- GeIL EVO Corsa DIMM Kit 8GB PC3-17066U CL9-10-9-28 (DDR3-2133) (GOC38GB2133C9ADC)
- G.Skill RipJaws-X DIMM Kit 8GB PC3-14900U CL9-10-9-28 (DDR3-1866) (F3-14900CL9D-8GBXL)
- G.Skill Sniper DIMM Kit 8GB PC3-17066U CL9-11-10-28 (DDR3-2133) (F3-17000CL9D-8GBSR)
***
- 4*4GB
- Corsair Vengeance schwarz DIMM Kit 16GB PC3-12800U CL9-9-9-24 (DDR3-1600) (CMZ16GX3M4A1600C9)
- Corsair Vengeance Low Profile schwarz DIMM Kit 16GB PC3-12800U CL9-9-9-24 (DDR3-1600) (CML16GX3M4A1600C9)
- Kingston ValueRAM DIMM Kit 8GB PC3-10667U CL9 (DDR3-1333) (KVR1333D3N9K2/8G)
***
- 2*8GB
- Mushkin Enhanced Blackline Frostbyte DIMM Kit 16GB PC3-14900U CL11-11-11-27 (DDR3L-1866) (997072)
------------------------------------------------------------
inkompatibel:
- 2*2GB
***
- 2*4GB
***
- 4*4GB
xxxKompatibilität CPU Kühler:
Liste mit passenden Lüftkühler:
- Noctua NH-D14 (Sockel 775/1155/1156/1366/AMD/AM2/AM2+/AM3/AM3+/FM1)
- Phanteks PH-TC14PE (Sockel 1155/1156/1366/AM2/AM3) alle Richtungen montierbar
- Prolimatech Genesis Kühlkörper (Sockel 775/1155/1156/1366/AM2/AM2+/AM3/AM3+/FM1) / überdeckt den 1 PCIe Slot / RAM-Höhe beachten!
- Thermalright True Spirit 140 (Sockel AM2/AM2+/AM3/775/1155/1156/1366) verdeckt nicht den 1.Slot
Liste mit passenden Wasserkühler:
- So wie ich das bei meinem UD5H sehe, kann man den Heatkiller 3.0 wieder in allen Richtungen beim Z77X montieren. Beim Gigabyte Z68X waren ja Kondensatoren im Weg!
xxxReviews / Unboxing:
Reviews:
- Close-up look at GIGABYTE's Intel Z77 Ivy Bridge motherboards
- Gigabyte Z77X-UD5H Review auf xtremesystems.org
- GIGABYTE GA-Z77X-UD5H WiFi & GA-Z77X-UD3H Motherboard Reviews fom legitreviews
- Ivy Bridge preview with GIGABYTE Z77X-UD5H (Intel Z77) and Core i5 3570K :: TweakTown USA Edition
- Ivy Bridge preview with GIGABYTE Z77X-UD5H (Intel Z77) and Core i7 3770K :: TweakTown USA Edition
- Motherboard-Gigabyte-Z77X-UD5H sinhardware.com
- Gigabyte-Z77X-UD5H Motherboard eteknix.com
- Gigabyte-Z77X-UD3H - Motherboard von hardwaresecrets.com
- Gigabyte Z77X-UD3H Intel Z77 Motherboard Review thinkcomputers
Unboxing:
- GA-Z77X - D3H
- GA-Z77X - UD5H
xxxSupport JZ electronic:
Infos:
- Einstellung Lüftersteuerung:
--------------------------------------
Links:
- BIOSe und News von JZ electronic
Gruß -Elle-
Zuletzt bearbeitet:






 jetzt hab ich auf beiden das gleiche bios drauf, nämlich f7. aber das bios profil und die einstellungen hatter nich übernommen oder ? ich mein fänd ich sogar ideal, aber ich denke eher das er das bios in rohform nur kopiert hat oder ?
 es is das gleiche als würdest du den schalter umlegen, nur einfacher