[Sammelthread] Intel DDR5 RAM OC Thread

Wenn Du diese Anzeige nicht sehen willst, registriere Dich und/oder logge Dich ein.
My crap sp93 can do 56p 45e on 1.17V
Ks can do 55p ~1.12V
I know that's why I was surprised.
Tried it with 50 too, doesn't help. Going higher wouldn't worth it in speed.
Maybe need some other changes as well.

Now tightened the 8400 further. TWR, tWTR, seems it works too.
This IMC feels itself best on 8400. 8533 is doable as it was before, but 8600 still a no go. I don't know why.
I don't think it's the board, since 8600 TM5 worked several times.

1716992817402.png
 
Zuletzt bearbeitet:
Zuletzt bearbeitet:
Changed Max CPU Cache Ratio from Auto to 44 (Min CPU Cache at Auto) and now seems to be stable...
Always pics,or it didnt happen :-)
50 max still ?
Beitrag automatisch zusammengeführt:

Before i forget
You changed VDDQ Training off.
Probably still are on PC

So please,
PSU off, then hold the powerbutton to discharge everything fully
For about 10 sec
And then power on

This will force a clean training, as ME can cause bugs with SA-VID changes and also 3+4?, lets say 8 hidden options need to readjust with IVR-VDDQ_IMC change.

Its mostly ME that bugs on training options change :-)
 
Zuletzt bearbeitet:
Always pics, or it didn't happen:-)
50 max silent?
Beitrag automatisch zusammengeführt:

Before I forget
You changed VDDQ Training off.
Probably still are on PC

So please,
PSU off, then hold the power button to discharge everything fully
For about 10 sec
And then power on

This will force a clean training, as ME can cause bugs with SA-VID changes and also 3+4?, lets say 8 hidden options need to readjust with IVR-VDDQ_IMC change.

It's mostly ME that bugs on training options change:-)
Yes, I know you love pics:)
No, now max ring is at 44

I also undervolted through VF points 6-11 by 0.08, sounds good? Now it runs ycruncher at 55/42/44 HT On at 1.1v/270w

I will do that, PSU off etc right now.
Want me to rerun ycruncher then? For how long?
 
Zuletzt bearbeitet:
Yes, I know you love pics:)
No, now max ring is at 44
Can use more data of it and find misbehaving things.
Yess, i like visual data :-)

No, now max ring is at 44
Didnt phrase it well,
"how far do you come with Ring before it crashes. Is 50 multiplier cap ok or also crashes ?"

I also undervolted through VF points 6-11 by 0.08, sounds good?
The curve is algorithmic and dynamic.
You can not do that.
Use Worktool , show me the curve of your sample on "trained" curve.
Then from it , use either P10 or P11 (whatever is higher) and put a -42mV offset.
The "purposed curve" are the values you will get, to input into the Bios
// it likely will be like P10 -42, P9 -28, P7 -13, P6 -3 , something like this as an illustration. Use the tool :-)

"highest voltage point wins"
Remember that.
Any little frequency step, is not allowed to be lower than the previous one
Every little step needs to have higher voltage requests, be it by 2mV.

The offsets have no meaning by itself. They are fixed drops of calculated curve.
So whatever value you put, thats a drop but not a real value.
Want me to rerun ycruncher then? For how long?
Up to you
Y-cruncher for CPU stability, like any other test min 45-90min.
I suggest at very least an hour, or if you dont rush minimum 90min.

But fact of the matter is , Ring is unstable (maybe even on stock operation, you can downclock to 7600 to verify why normal boosting breaks).
And VDD2_CPU doesnt belong to Ring (unless i'm very wrong, but i think i'm not)

EDIT:
There are a decently big amount of CPUs that fail even at 7800.
Soo its no surprise, but it can be. This is a reason why i want you to pass CB15 Extreme too.
There are plenty of CPUs that "die" within 3 months of OC usage and can't be stable on stock operation even.
That everyone of those gets overvolted, with open ICCMAX limiters and 1.7v boosting range ~ oh well. It doesn't help.

People fear y-cruncher too much,
But its not such a heavy load. Real-world Bio Simulation, weather forecast's and even some of 3D modelling is worse.
People fear the temp also too much, when Lab tortures them at 150-160°C to speedup degradation process & rates them for several years
105° are nothing in comparison , and IntelHQ still requires nearly half a year to have any significant degradation.
Any case, most of the time the sample bought was never stable to begin with. And its not just "us enthusiast's".
 
Zuletzt bearbeitet:
Use Worktool , show me the curve of your sample on "trained" curve.
Then from it, use either P10 or P11 (whichever is higher) and put a -42mV offset.
The "purposed curve" are the values you will get to input into the Bios
// it likely will be like P10 -42, P9 -28, P7 -13, P6 -3 , something like this as an illustration. Use the tool:-)

"highest voltage point wins"
Remember that.
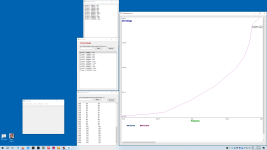
Here is the curve.
VFCurve.png
 
Here is the curve.
Curve as always looks , questionable - with the dip near 700mV
But oh well thats irrelevant now.

Use -73mV on P11 please
Whatever tool spills out , that's your curve
Use "proposed v/f points" it writes out and input them in the Bios

It will likely not fix Ring
But ICCMAX factors in Ring too and too tight VRMAX is known to cause crashes (yet i don't accept 1720mV stock, i can't)
If cores are too hungry it will hurt several IP parts.
Especially if they are overvolted like this.

Lets see.
 
There are a decently large amount of CPUs that fail even at 7800.
I hope im not the case. I see many people at OCNet complain of not being able to get 2x16GB kits stable at 8000 and maxed at 7800, and when they got 2x24GB kit they even managed to run 8200. I just cant afford to gamble 300 euros to see if i can get 8000 on my setup.
 
I hope im not the case. I see many people at OCNet complain of not being able to get 2x16GB kits stable at 8000 and maxed at 7800, and when they got 2x24GB kit they even managed to run 8200. I just cant afford to gamble 300 euros to see if i can get 8000 on my setup.
I have not enough data for it
But the number is big.

// tbh one shouldn't feel too bad about Intel, because the number on horrible/failed bins on AM5 is even bigger
// ~ but tech media hasnt catched up to that yet because AMDs multi-stage algo and age-factor works as intended. Intel's has trouble.

Its yet not a 1/5 chance. It should be lower.
And it doesn't matter too much for normal consumers, because with tight powerlimiters such issue is hard to notice.

Well we know its unstable at least :)
Let's see further from here.
It can be diagnosed
 
Curve as always looks, questionable - with the dip near 700mV
But oh well that’s irrelevant now.

Use -73mV on P11 please
Whatever tool spills out, that's your curve
Use "proposed v/f points" it writes out and input them in the Bios

It will likely not fix Ring
But ICCMAX factors in Ring too and too tight VRMAX is known to cause crashes (yet i don't accept 1720mV stock, i can't)
If cores are too hungry it will hurt several IP parts.
Especially if they are overvolted like this.

Let's see.
I dont know how this tool works tbh. I just go into bios and set VF 11 at -0.073 and post the new curve from the tool?
 
I dont know how this tool works tbh. I just go into bios and set VF 11 at -0.073 and post the new curve from the tool?
Nono , you click
1717013574661.png

on P11,
write above the value in mV , aka -73
Then click apply

It will calculate & update this field
1717013607269.png

And tell you what changes you need to apply for the curve to function
Read Part 3 & Part 5. Non are active changes
1717013636618.png

You can screenshot your tuned values and then input them in the bios
Using only one curve point is wrong, as previous points will remain high
Rule of "highest voltage wins". Curve needs to be curvy not like a roller coaster spiking up.
 
Zuletzt bearbeitet:
Did it and only changed VF11 at -73mv, all others remained the same
Wonder if you have an old version or it bugs for 14900KS (old version)
Maybe press refresh or reopen them without quitting WorkTool.

For the future, HWInfo and ASUS WorkTool bother each other
So also ATC and WorkTool bother each other.
 
Wonder if you have an old version or there bugs for 14900KS (old version)
Maybe press refresh or reopen them without quitting WorkTool.

For the future, HWInfo and ASUS WorkTool bother each other
So ATC and WorkTool bother each other.
I use M15_OCPAK1121, I don't have HWInfo or ATC or anything else...

I hit apply, then refresh and then generate and I get this
Untitled.png
 
I hit apply, then refresh and then generate and I get this
1717018090660.png

It should have applied, but it doesnt.
Maybe because TVB is detected as disabled, or because tool/update is bugged for KS.

Write P10 to -73 and then P9 to -73 .
Stop when tool finally begins to build a curve.
If P9 doesnt even make a curve, its bugged.
 
Anhang anzeigen 1002282
It should have applied, but it doesn't.
Maybe because TVB is detected as disabled, or because tool/update is bugged for KS.

Write P10 to -73 and then P9 to -73 .
Stop when tool finally begins to build a curve.
If P9 doesn't even make a curve, it's bugged.
Does this seem right?
-73.png
 
Does this seem right?
Not fully :) there shouldnt be a need to reopen it even. It has to show a before and after curve
Use https://www.dropbox.com/scl/fi/pt1g87eezibpmob28uph5/OCPak.zip?dl=0&e=1&file_subpath=/OCPak/OCTool1018.zip&rlkey=crry69241xkdded867ojh1zre
Just to make sure.
Higher version doesnt mean its newer.

Higher version can be Alderlake Branch still.

EDIT:
Alternatively try a -145mV drop on P11 // maybe not stable
See if other points follow this.
It should;
 
Alternatively try a -145mV drop on P11 // maybe not stable
See if other points follow this.
It should;
Either it doesnt work at all or i am clueless and do something wrong.
Shall i have any specific setting in bios enabled or disabled for it to work?
 
Either it doesnt work at all or i am clueless and do something wrong.
Shall i have any specific setting in bios enabled or disabled for it to work?
I wonder what is up with it too
Usually no, not at all.

At least on the big change, it should most definitely take over P8 and even P7.
It could be a KS incompatibility. Its strange

I remember the latest ASUS Tweak Tool had a curve editor too. A graphical which zebra_hun showed.
This one , its "bloat" like armory crate ~ but the armory crate uninstaller can remove some traces of it, if it bothers too much.
Else Revo Uninstaller portable, does a well job

Oh it can be that CpuDoc also bothers, but it shouldnt
It doesnt use any low level Intel API - only on Ryzen it does that.

AI-Suite should have a curve tweak option :)
You want that stable on SFT at least 10 cycles (alternate with another test like VST)
Stable in CB15 Extreme (be sure IA CEP is disabled), and have no score loss in Geekbench 3,6 and then another program/game of choice
You need dynamic load programs to see if you start to lose performance.

As clock doesnt mean anything. Its whats happens internally
A higher frontend clock strap can still result in lower performance when it throttles internally.


EDIT:
Sorry for the slow responses.
This (here midnight) is the time i get to take care of work stuff in peace.
When it's cold and quiet :giggle:

EDIT2:
I would suggest a tiny bump at P5 like +29mV & P6 on +13
When you get to modify stuff with a curve editor
This should be plenty , and then of course at very least a -42mV drop on P11 or any P9-P11 that starts to change the other ones down
Its work. No easy way out. Testing testing testing
 
Zuletzt bearbeitet:
But the highest point i can tune is VF Point 9 and that by 0.010v steps
Then it is lack of active TVB that prevents you for P10-P12.
But for now thats ok , you can push them down a bit
All of them a bit
P9 -80, ~ see if P7 follows, else P7 -50
P6 +10, P5 +30
 
@ Darkthrone

Just nice, slowly. You got a lot of new information today. Give yourself time to get to know them and learn to use them.
Of course, you also need to know the cpu. I know the settings for each frequency on my own cpu. You also need to know them.
If you go slow with it, you go slow, no problem. It's not a few minutes and it's done.
Of course, if I may give you some advice ;)
Every time I sit here, I try something new.
CPU stability is important, closely related to RAM overclock.
But I don't want to disturb the forum with the topic, I know many people don't like it.
Just start playing with the Curve editor and watch the changes.
Veii is right, I don't always do it as he writes either. Sooner or later, of course, I do it that way, but I often try something else on my own.
For example, instead of the original 56x P, I came up with the 54x P just for testing, but I liked it, and I don't experience any disadvantages during the weekdays. If I want, of course I can enter 56 or whatever I want.
With these few lines, I just wanted to say that don't be in a hurry, it will never lead to anything good. A lot of information at once can confuse you.
Don't give up, it's important ;)


PS.:
Yesterday what i made:
[2024/05/29 18:26:18]
Ai Overclock Tuner [Manual]
BCLK Frequency [100.0000]
PCIE Frequency [100.0000]
Intel(R) Adaptive Boost Technology [Auto]
ASUS MultiCore Enhancement [Enabled – Remove All limits (90°C)]
SVID Behavior [Trained]
BCLK Frequency : DRAM Frequency Ratio [100:100]
Memory Controller : DRAM Frequency Ratio [1:2]
DRAM Frequency [DDR5-8000MHz]
Performance Core Ratio [By Core Usage]
1-Core Ratio Limit [57]
2-Core Ratio Limit [57]
3-Core Ratio Limit [56]
4-Core Ratio Limit [56]
5-Core Ratio Limit [55]
6-Core Ratio Limit [55]
7-Core Ratio Limit [54]
8-Core Ratio Limit [54]
Performance Core0 Specific Ratio Limit [Auto]
Performance Core0 specific Voltage [Auto]
Performance Core1 Specific Ratio Limit [Auto]
Performance Core1 specific Voltage [Auto]
*Performance Core2 Specific Ratio Limit [Auto]
Performance Core2 specific Voltage [Auto]
*Performance Core3 Specific Ratio Limit [Auto]
Performance Core3 specific Voltage [Auto]
Performance Core4 Specific Ratio Limit [Auto]
Performance Core4 specific Voltage [Auto]
Performance Core5 Specific Ratio Limit [Auto]
Performance Core5 specific Voltage [Auto]
Performance Core6 Specific Ratio Limit [Auto]
Performance Core6 specific Voltage [Auto]
Performance Core7 Specific Ratio Limit [Auto]
Performance Core7 specific Voltage [Auto]
Efficient Core Ratio [By Core Usage]
Efficient Turbo Ratio Limit 1 [43]
Efficient Turbo Ratio Cores 1 [Auto]
Efficient Core Group0 Specific Ratio Limit [Auto]
Efficient Core Group0 specific Voltage [Auto]
Efficient Core Group1 Specific Ratio Limit [Auto]
Efficient Core Group1 specific Voltage [Auto]
Efficient Core Group2 Specific Ratio Limit [Auto]
Efficient Core Group2 specific Voltage [Auto]
Efficient Core Group3 Specific Ratio Limit [Auto]
Efficient Core Group3 specific Voltage [Auto]
AVX2 [Auto]
AVX2 Ratio Offset to per-core Ratio Limit [Auto]
AVX2 Voltage Guardband Scale Factor [Auto]
Maximus Tweak [Mode 2]
DRAM CAS# Latency [36]
DRAM RAS# to CAS# Delay Read [46]
DRAM RAS# to CAS# Delay Write [16]
DRAM RAS# PRE Time [46]
DRAM RAS# ACT Time [58]
DRAM Command Rate [2N]
DRAM RAS# to RAS# Delay L [8]
DRAM RAS# to RAS# Delay S [8]
DRAM REF Cycle Time 2 [480]
DRAM REF Cycle Time Same Bank [448]
DRAM Refresh Interval [262143]
DRAM WRITE Recovery Time [24]
DRAM READ to PRE Time [12]
DRAM FOUR ACT WIN Time [32]
DRAM WRITE to READ Delay L [16]
DRAM WRITE to READ Delay S [4]
DRAM CKE Minimum Pulse Width [20]
DRAM Write Latency [34]
Ctl0 dqvrefup [170]
Ctl0 dqvrefdn [88]
Ctl0 dqodtvrefup [Auto]
Ctl0 dqodtvrefdn [Auto]
Ctl1 cmdvrefup [114]
Ctl1 ctlvrefup [Auto]
Ctl1 clkvrefup [Auto]
Ctl1 ckecsvrefup [Auto]
Ctl2 cmdvrefdn [Auto]
Ctl2 ctlvrefdn [Auto]
Ctl2 clkvrefdn [Auto]
Read Equalization RxEq Start Sign [-]
Read Equalization RxEq Start [Auto]
Read Equalization RxEq Stop Sign [-]
Read Equalization RxEq Stop [Auto]
ODT_READ_DURATION [Auto]
ODT_READ_DELAY [Auto]
ODT_WRITE_DURATION [Auto]
ODT_WRITE_DELAY [Auto]
DQ RTT WR [40 DRAM Clock]
DQ RTT NOM RD [40 DRAM Clock]
DQ RTT NOM WR [34 DRAM Clock]
DQ RTT PARK [34 DRAM Clock]
DQ RTT PARK DQS [34 DRAM Clock]
GroupA CA ODT [240 DRAM Clock]
GroupA CS ODT [0 DRAM Clock]
GroupA CK ODT [0 DRAM Clock]
GroupB CA ODT [60 DRAM Clock]
GroupB CS ODT [40 DRAM Clock]
GroupB CK ODT [40 DRAM Clock]
Pull-up Output Driver Impedance [48 DRAM Clock]
Pull-Down Output Driver Impedance [40 DRAM Clock]
DQ RTT WR [40 DRAM Clock]
DQ RTT NOM RD [40 DRAM Clock]
DQ RTT NOM WR [34 DRAM Clock]
DQ RTT PARK [34 DRAM Clock]
DQ RTT PARK DQS [34 DRAM Clock]
GroupA CA ODT [240 DRAM Clock]
GroupA CS ODT [0 DRAM Clock]
GroupA CK ODT [0 DRAM Clock]
GroupB CA ODT [60 DRAM Clock]
GroupB CS ODT [40 DRAM Clock]
GroupB CK ODT [40 DRAM Clock]
Pull-up Output Driver Impedance [40 DRAM Clock]
Pull-Down Output Driver Impedance [48 DRAM Clock]
Round Trip Latency Init Value MC0 CHA [Auto]
Round Trip Latency Max Value MC0 CHA [Auto]
Round Trip Latency Offset Value Mode Sign MC0 CHA [-]
Round Trip Latency Offset Value MC0 CHA [Auto]
Round Trip Latency Init Value MC0 CHB [Auto]
Round Trip Latency Max Value MC0 CHB [Auto]
Round Trip Latency Offset Value Mode Sign MC0 CHB [-]
Round Trip Latency Offset Value MC0 CHB [Auto]
Round Trip Latency Init Value MC1 CHA [Auto]
Round Trip Latency Max Value MC1 CHA [Auto]
Round Trip Latency Offset Value Mode Sign MC1 CHA [-]
Round Trip Latency Offset Value MC1 CHA [Auto]
Round Trip Latency Init Value MC1 CHB [Auto]
Round Trip Latency Max Value MC1 CHB [Auto]
Round Trip Latency Offset Value Mode Sign MC1 CHB [-]
Round Trip Latency Offset Value MC1 CHB [Auto]
Round Trip Latency MC0 CHA R0 [Auto]
Round Trip Latency MC0 CHA R1 [Auto]
Round Trip Latency MC0 CHA R2 [0]
Round Trip Latency MC0 CHA R3 [0]
Round Trip Latency MC0 CHA R4 [0]
Round Trip Latency MC0 CHA R5 [0]
Round Trip Latency MC0 CHA R6 [0]
Round Trip Latency MC0 CHA R7 [0]
Round Trip Latency MC0 CHB R0 [Auto]
Round Trip Latency MC0 CHB R1 [Auto]
Round Trip Latency MC0 CHB R2 [0]
Round Trip Latency MC0 CHB R3 [0]
Round Trip Latency MC0 CHB R4 [0]
Round Trip Latency MC0 CHB R5 [0]
Round Trip Latency MC0 CHB R6 [0]
Round Trip Latency MC0 CHB R7 [0]
Round Trip Latency MC1 CHA R0 [Auto]
Round Trip Latency MC1 CHA R1 [Auto]
Round Trip Latency MC1 CHA R2 [0]
Round Trip Latency MC1 CHA R3 [0]
Round Trip Latency MC1 CHA R4 [0]
Round Trip Latency MC1 CHA R5 [0]
Round Trip Latency MC1 CHA R6 [0]
Round Trip Latency MC1 CHA R7 [0]
Round Trip Latency MC1 CHB R0 [Auto]
Round Trip Latency MC1 CHB R1 [Auto]
Round Trip Latency MC1 CHB R2 [0]
Round Trip Latency MC1 CHB R3 [0]
Round Trip Latency MC1 CHB R4 [0]
Round Trip Latency MC1 CHB R5 [0]
Round Trip Latency MC1 CHB R6 [0]
Round Trip Latency MC1 CHB R7 [0]
Early Command Training [Auto]
SenseAmp Offset Training [Auto]
Early ReadMPR Timing Centering 2D [Auto]
Read MPR Training [Auto]
Receive Enable Training [Auto]
Jedec Write Leveling [Auto]
Early Write Time Centering 2D [Auto]
Early Read Time Centering 2D [Auto]
Write Timing Centering 1D [Auto]
Write Voltage Centering 1D [Auto]
Read Timing Centering 1D [Auto]
Read Timing Centering with JR [Auto]
Dimm ODT Training* [Disabled]
Max RTT_WR [ODT Off]
DIMM RON Training* [Disabled]
Write Drive Strength/Equalization 2D* [Auto]
Write Slew Rate Training* [Auto]
Read ODT Training* [Disabled]
Comp Optimization Training [Auto]
Read Equalization Training* [Auto]
Read Amplifier Training* [Auto]
Write Timing Centering 2D [Auto]
Read Timing Centering 2D [Auto]
Command Voltage Centering [Auto]
Early Command Voltage Centering [Auto]
Write Voltage Centering 2D [Auto]
Read Voltage Centering 2D [Auto]
Late Command Training [Auto]
Round Trip Latency [Auto]
Turn Around Timing Training [Auto]
CMD CTL CLK Slew Rate [Auto]
CMD/CTL DS & E 2D [Auto]
Read Voltage Centering 1D [Auto]
TxDqTCO Comp Training* [Auto]
ClkTCO Comp Training* [Auto]
TxDqsTCO Comp Training* [Auto]
VccDLL Bypass Training [Auto]
CMD/CTL Drive Strength Up/Dn 2D [Auto]
DIMM CA ODT Training [Auto]
PanicVttDnLp Training* [Auto]
Read Vref Decap Training* [Auto]
Vddq Training [Disabled]
Duty Cycle Correction Training [Auto]
Periodic DCC [Auto]
Rank Margin Tool Per Bit [Auto]
DIMM DFE Training [Auto]
EARLY DIMM DFE Training [Auto]
Tx Dqs Dcc Training [Auto]
DRAM DCA Training [Auto]
Write Driver Strength Training [Auto]
Rank Margin Tool [Auto]
Memory Test [Auto]
DIMM SPD Alias Test [Auto]
Receive Enable Centering 1D [Auto]
Retrain Margin Check [Auto]
Write Drive Strength Up/Dn independently [Auto]
LPDDR DqDqs Re-Training [Auto]
Margin Check Limit [Disabled]
tRDRD_sg_Training [Auto]
tRDRD_sg_Runtime [16]
tRDRD_dg_Training [Auto]
tRDRD_dg_Runtime [8]
tRDWR_sg [20]
tRDWR_dg [20]
tWRWR_sg [16]
tWRWR_dg [8]
tWRRD_sg [Auto]
tWRRD_dg [Auto]
tRDRD_dr [0]
tRDRD_dd [0]
tRDWR_dr [0]
tRDWR_dd [0]
tWRWR_dr [0]
tWRWR_dd [0]
tWRRD_dr [0]
tWRRD_dd [0]
tRPRE [Auto]
tWPRE [Auto]
tWPOST [Auto]
tWRPRE [Auto]
tPRPDEN [2]
tRDPDEN [45]
tWRPDEN [Auto]
tCPDED [20]
tREFIX9 [Auto]
Ref Interval [Auto]
tXPDLL [Auto]
tXP [30]
tPPD [2]
tCCD_L_tDLLK [Auto]
tZQCAL [Auto]
tZQCS [Auto]
OREF_RI [Auto]
Refresh Watermarks [High]
Refresh Hp Wm [Auto]
Refresh Panic Wm [Auto]
Refresh Abr Release [Auto]
tXSDLL [2559]
tZQOPER [Auto]
tMOD [Auto]
CounttREFIWhileRefEn [Auto]
HPRefOnMRS [Auto]
SRX Ref Debits [Auto]
RAISE BLK WAIT [Auto]
Ref Stagger En [Auto]
Ref Stagger Mode [Auto]
Disable Stolen Refresh [Auto]
En Ref Type Display [Auto]
Trefipulse Stagger Disable [Auto]
tRPab ext [Auto]
derating ext [Auto]
Allow 2cyc B2B LPDDR [Auto]
tCSH [Auto]
tCSL [Auto]
powerdown Enable [Auto]
idle length [Auto]
raise cke after exit latency [Auto]
powerdown latency [Auto]
powerdown length [Auto]
selfrefresh latency [Auto]
selfrefresh length [Auto]
ckevalid length [Auto]
ckevalid enable [Auto]
idle enable [Auto]
selfrefresh enable [Auto]
Address mirror [Auto]
no gear4 param divide [Auto]
x8 device [Auto]
no gear2 param divide [Auto]
ddr 1dpc split ranks on subch [Auto]
write0 enable [Auto]
MultiCycCmd [Auto]
WCKDiffLowInIdle [Auto]
PBR Disable [Auto]
PBR OOO Dis [Auto]
PBR Disable on hot [Auto]
PBR Exit on Idle Cnt [Auto]
tXSR [519]
Dec tCWL [Auto]
Add tCWL [Auto]
Add 1Qclk delay [Auto]
MRC Fast Boot [Disabled]
MCH Full Check [Auto]
Mem Over Clock Fail Count [3]
Training Profile [Auto]
RxDfe [Auto]
Mrc Training Loop Count [3]
DRAM CLK Period [Auto]
Dll_bwsel [Auto]
Controller 0, Channel 0 Control [Enabled]
Controller 0, Channel 1 Control [Enabled]
Controller 1, Channel 0 Control [Enabled]
Controller 1, Channel 1 Control [Enabled]
MC_Vref0 [Auto]
MC_Vref1 [Auto]
MC_Vref2 [Auto]
Fine Granularity Refresh mode [Auto]
SDRAM Density Per Die [Auto]
SDRAM Banks Per Bank Group [Auto]
SDRAM Bank Groups [Auto]
Dynamic Memory Boost [Disabled]
Realtime Memory Frequency [Disabled]
SA GV [Disabled]
Voltage Monitor [Die Sense]
VRM Initialization Check [Enabled]
CPU Input Voltage Load-line Calibration [Auto]
CPU Load-line Calibration [Auto]
Synch ACDC Loadline with VRM Loadline [Enabled]
CPU Current Capability [140%]
CPU Current Reporting [Auto]
Core Voltage Suspension [Auto]
CPU VRM Switching Frequency [Auto]
VRM Spread Spectrum [Disabled]
CPU Power Duty Control [Auto]
CPU Power Phase Control [Auto]
CPU Power Thermal Control [125]
CPU Core/Cache Boot Voltage [Auto]
CPU Input Boot Voltage [Auto]
PLL Termination Boot Voltage [Auto]
CPU Standby Boot Voltage [Auto]
Memory Controller Boot Voltage [Auto]
CPU Core Auto Voltage Cap [Auto]
CPU Input Auto Voltage Cap [Auto]
Memory Controller Auto Voltage Cap [Auto]
Fast Throttle Threshold [Auto]
Package Temperature Threshold [Auto]
Regulate Frequency by above Threshold [Auto]
IVR Transmitter VDDQ ICCMAX [Auto]
Unlimited ICCMAX [Auto]
CPU Core/Cache Current Limit Max. [Auto]
Long Duration Package Power Limit [300]
Package Power Time Window [Auto]
Short Duration Package Power Limit [320]
Dual Tau Boost [Disabled]
IA AC Load Line [Auto]
IA DC Load Line [Auto]
IA CEP [Disabled]
SA CEP [Disabled]
IA SoC Iccmax Reactive Protector [Disabled]
Inverse Temperature Dependency Throttle [Auto]
IA VR Voltage Limit [1580]
CPU SVID Support [Auto]
IA TDC Current Limit [Auto]
Cache Dynamic OC Switcher [Disabled]
TVB Voltage Optimizations [Disabled]
Enhanced TVB [Disabled]
Overclocking TVB [Disabled]
Overclocking TVB Global Temperature Offset Sign [+]
Overclocking TVB Global Temperature Offset Value [Auto]
Offset Mode Sign 1 [-]
V/F Point 1 Offset [0.01200]
Offset Mode Sign 2 [-]
V/F Point 2 Offset [0.00600]
Offset Mode Sign 3 [+]
V/F Point 3 Offset [0.04500]
Offset Mode Sign 4 [+]
V/F Point 4 Offset [0.04300]
Offset Mode Sign 5 [+]
V/F Point 5 Offset [0.01300]
Offset Mode Sign 6 [-]
V/F Point 6 Offset [0.06200]
Offset Mode Sign 7 [-]
V/F Point 7 Offset [0.11900]
Offset Mode Sign 8 [-]
V/F Point 8 Offset [0.00800]
Offset Mode Sign 9 [-]
V/F Point 9 Offset [0.04400]
Offset Mode Sign 10 [-]
V/F Point 10 Offset [0.04300]
Offset Mode Sign 11 [-]
V/F Point 11 Offset [0.04100]
Initial BCLK Frequency [Auto]
Runtime BCLK OC [Auto]
BCLK Amplitude [Auto]
BCLK Slew Rate [Auto]
BCLK Spread Spectrum [Auto]
Initial PCIE Frequency [Auto]
PCIE/DMI Amplitude [Auto]
PCIE/DMI Slew Rate [Auto]
PCIE/DMI Spread Spectrum [Auto]
Cold Boot PCIE Frequency [Auto]
Realtime Memory Timing [Disabled]
SPD Write Disable [TRUE]
PVD Ratio Threshold [Auto]
SA PLL Frequency Override [Auto]
BCLK TSC HW Fixup [Enabled]
Core Ratio Extension Mode [Disabled]
FLL OC mode [Auto]
UnderVolt Protection [Disabled]
Switch Microcode [Current Microcode]
Xtreme Tweaking [Disabled]
Core PLL Voltage [Auto]
GT PLL Voltage [Auto]
Ring PLL Voltage [Auto]
System Agent PLL Voltage [Auto]
Memory Controller PLL Voltage [Auto]
Efficient-core PLL Voltage [Auto]
CPU 1.8V Small Rail [Auto]
PLL Termination Voltage [Auto]
CPU Standby Voltage [1.10000]
PCH 1.05V Voltage [Auto]
PCH 0.82V Voltage [Auto]
CPU Input Voltage Reset Voltage [Auto]
Eventual CPU Input Voltage [Auto]
Eventual Memory Controller Voltage [Auto]
Package Temperature Threshold [Auto]
Regulate Frequency by above Threshold [Auto]
Cooler Efficiency Customize [Keep Training]
Cooler Re-evaluation Algorithm [Normal]
Optimism Scale [100]
Ring Down Bin [Auto]
Min. CPU Cache Ratio [11]
Max. CPU Cache Ratio [47]
BCLK Aware Adaptive Voltage [Auto]
Actual VRM Core Voltage [Auto]
Global Core SVID Voltage [Auto]
Cache SVID Voltage [Auto]
CPU L2 Voltage [Auto]
CPU System Agent Voltage [Manual Mode]
- CPU System Agent Voltage Override [1.12000]
CPU Input Voltage [Auto]
High DRAM Voltage Mode [Enabled]
DRAM VDD Voltage [1.44000]
DRAM VDDQ Voltage [1.38000]
IVR Transmitter VDDQ Voltage [1.17500]
Memory Controller Voltage [1.35625]
MC Voltage Calculation Voltage Base [Auto]
VDD Calculation Voltage Base [Auto]
PMIC Voltages [Sync All PMICs]
SPD HUB VLDO (1.8V) [1.80000]
SPD HUB VDDIO (1.0V) [1.00000]
DRAM VDD Voltage [1.44000]
DRAM VDDQ Voltage [1.38000]
DRAM VPP Voltage [1.81500]
DRAM VDD Switching Frequency [1.50000]
DRAM VDDQ Switching Frequency [1.50000]
DRAM VPP Switching Frequency [1.50000]
DRAM Current Capability [7.87500]
PCI Express Native Power Management [Disabled]
DMI Link ASPM Control [Disabled]
ASPM [Disabled]
L1 Substates [Disabled]
DMI ASPM [Disabled]
DMI Gen3 ASPM [Disabled]
PEG - ASPM [Disabled]
PCI Express Clock Gating [Disabled]
Hardware Prefetcher [Enabled]
Adjacent Cache Line Prefetch [Enabled]
Intel (VMX) Virtualization Technology [Disabled]
Per P-Core Control [Disabled]
Per E-Core Control [Disabled]
Active Performance Cores [All]
Active Efficient Cores [All]
Hyper-Threading [Enabled]
Hyper-Threading of Core 0 [Enabled]
Hyper-Threading of Core 1 [Enabled]
Hyper-Threading of Core 2 [Enabled]
Hyper-Threading of Core 3 [Enabled]
Hyper-Threading of Core 4 [Enabled]
Hyper-Threading of Core 5 [Enabled]
Hyper-Threading of Core 6 [Enabled]
Hyper-Threading of Core 7 [Enabled]
Total Memory Encryption [Disabled]
Legacy Game Compatibility Mode [Disabled]
Boot performance mode [Auto]
Intel(R) SpeedStep(tm) [Enabled]
Intel(R) Speed Shift Technology [Enabled]
Intel(R) Turbo Boost Max Technology 3.0 [Enabled]
Turbo Mode [Enabled]
Acoustic Noise Mitigation [Disabled]
CPU C-states [Auto]
Thermal Monitor [Enabled]
Dual Tau Boost [Disabled]
VT-d [Disabled]
Memory Remap [Enabled]
Enable VMD controller [Enabled]
Map PCIe Storage under VMD [Disabled]
Map SATA Controller under VMD [Disabled]
M.2_1 Link Speed [Auto]
PCIEX16(G5)_1 Link Speed [Auto]
PCIEX16(G5)_2 Link Speed [Auto]
PCIEX1(G4) Link Speed [Auto]
PCIEX4(G4) Link Speed [Auto]
M.2_2 Link Speed [Auto]
DIMM.2_1 Link Speed [Auto]
DIMM.2_2 Link Speed [Auto]
SATA Controller(s) [Enabled]
Aggressive LPM Support [Disabled]
SMART Self Test [Enabled]
M.2_3 [Enabled]
M.2_3 Hot Plug [Disabled]
SATA6G_1 [Enabled]
SATA6G_1 Hot Plug [Disabled]
SATA6G_2 [Enabled]
SATA6G_2 Hot Plug [Disabled]
SATA6G_3 [Enabled]
SATA6G_3 Hot Plug [Disabled]
SATA6G_4 [Enabled]
SATA6G_4 Hot Plug [Disabled]
PTT [Enable]
Intel(R) Dynamic Tuning Technology [Disabled]
PCIE Tunneling over USB4 [Enabled]
Discrete Thunderbolt(TM) Support [Disabled]
Security Device Support [Enable]
SHA256 PCR Bank [Enabled]
Pending operation [None]
Platform Hierarchy [Enabled]
Storage Hierarchy [Enabled]
Endorsement Hierarchy [Enabled]
Physical Presence Spec Version [1.3]
Disable Block Sid [Disabled]
USB Host Controller Support [Disabled]
Password protection of Runtime Variables [Enable]
Above 4G Decoding [Enabled]
Resize BAR Support [Enabled]
SR-IOV Support [Disabled]
Legacy USB Support [Enabled]
XHCI Hand-off [Enabled]
SanDisk [Auto]
LAN_U32G2_1 [Enabled]
U32G1_E5 [Enabled]
U32G1_E6 [Enabled]
U32G1_E7 [Enabled]
U32G1_E8 [Enabled]
U32G2X2_C3 [Enabled]
U32G2_5 [Enabled]
U32G2_6 [Enabled]
U32G2_7 [Enabled]
U32G2_P8 [Enabled]
U32G2X2_C9 [Enabled]
U32G1_E1 [Enabled]
U32G1_E2 [Enabled]
U32G1_E3 [Enabled]
U32G1_E4 [Enabled]
Network Stack [Disabled]
Device [N/A]
Restore AC Power Loss [Power Off]
Max Power Saving [Disabled]
ErP Ready [Disabled]
Power On By PCI-E [Disabled]
Power On By RTC [Disabled]
USB Audio [Enabled]
Intel LAN [Enabled]
USB power delivery in Soft Off state (S5) [Disabled]
Connectivity mode (Wi-Fi & Bluetooth) [Disabled]
When system is in working state [All On]
Q-Code LED Function [Auto]
When system is in sleep, hibernate or soft off states [All On]
M.2_2 Configuration [Auto]
ASMedia USB 3.2 Controller_U32G1_E12 [Enabled]
ASMedia USB 3.2 Controller_U32G1_E34 [Enabled]
GNA Device [Disabled]
ASMedia Storage Controller [Enabled]
Windows Hot-plug Notification [Disabled]
ASPM Support [Disabled]
CPU Temperature [Monitor]
CPU Package Temperature [Monitor]
MotherBoard Temperature [Monitor]
VRM Temperature [Monitor]
Chipset Temperature [Monitor]
T_Sensor Temperature [Monitor]
DIMM.2 Sensor 1 Temperature [Monitor]
DIMM.2 Sensor 2 Temperature [Monitor]
Water In T Sensor Temperature [Monitor]
Water Out T Sensor Temperature [Monitor]
DIMM A1 Temperature [Monitor]
DIMM B1 Temperature [Monitor]
CPU Fan Speed [Monitor]
CPU Optional Fan Speed [Monitor]
Chassis Fan 1 Speed [Monitor]
Chassis Fan 2 Speed [Monitor]
Chassis Fan 3 Speed [Monitor]
Water Pump+ Speed [Monitor]
AIO Pump Speed [Monitor]
Flow Rate [Monitor]
CPU Core Voltage [Monitor]
12V Voltage [Monitor]
5V Voltage [Monitor]
3.3V Voltage [Monitor]
Memory Controller Voltage [Monitor]
CPU Fan Q-Fan Control [DC Mode]
CPU Fan Profile [Standard]
CPU Fan Q-Fan Source [CPU]
CPU Fan Step Up [Level 0]
CPU Fan Step Down [Level 4]
CPU Fan Speed Low Limit [200 RPM]
Chassis Fan 1 Q-Fan Control [Auto Detect]
Chassis Fan 1 Profile [Standard]
Chassis Fan 1 Q-Fan Source [CPU]
Chassis Fan 1 Step Up [Level 0]
Chassis Fan 1 Step Down [Level 0]
Chassis Fan 1 Speed Low Limit [200 RPM]
Chassis Fan 2 Q-Fan Control [PWM Mode]
Chassis Fan 2 Profile [Standard]
Chassis Fan 2 Q-Fan Source [Chipset]
Chassis Fan 2 Step Up [Level 0]
Chassis Fan 2 Step Down [Level 4]
Chassis Fan 2 Speed Low Limit [200 RPM]
Chassis Fan 3 Q-Fan Control [DC Mode]
Chassis Fan 3 Profile [Silent]
Chassis Fan 3 Q-Fan Source [CPU]
Chassis Fan 3 Step Up [Level 0]
Chassis Fan 3 Step Down [Level 0]
Chassis Fan 3 Speed Low Limit [200 RPM]
Water Pump+ Q-Fan Control [PWM Mode]
Water Pump+ Profile [Manual]
Water Pump+ Q-Fan Source [CPU]
Water Pump+ Step Up [Level 0]
Water Pump+ Step Down [Level 5]
Water Pump+ Speed Low Limit [Ignore]
Water Pump+ Point4 Temperature [70]
Water Pump+ Point4 Duty Cycle (%) [100]
Water Pump+ Point3 Temperature [50]
Water Pump+ Point3 Duty Cycle (%) [95]
Water Pump+ Point2 Temperature [40]
Water Pump+ Point2 Duty Cycle (%) [80]
Water Pump+ Point1 Temperature [25]
Water Pump+ Point1 Duty Cycle (%) [60]
AIO Pump Q-Fan Control [Auto Detect]
AIO Pump Profile [Full Speed]
CPU Temperature LED Switch [Enabled]
Launch CSM [Disabled]
OS Type [Other OS]
Secure Boot Mode [Custom]
Fast Boot [Disabled]
Boot Logo Display [Auto]
POST Delay Time [3 sec]
Bootup NumLock State [On]
Wait For 'F1' If Error [Enabled]
Option ROM Messages [Force BIOS]
Interrupt 19 Capture [Disabled]
AMI Native NVMe Driver Support [Enabled]
Setup Mode [Advanced Mode]
Boot Sector (MBR/GPT) Recovery Policy [Local User Control]
Next Boot Recovery Action [Skip]
BIOS Image Rollback Support [Enabled]
Publish HII Resources [Disabled]
Flexkey [Safe Boot]
Setup Animator [Disabled]
Load from Profile [1]
Profile Name [8000P54RTTs]
Save to Profile [1]
DIMM Slot Number [DIMM_A1]
Download & Install ARMOURY CRATE app [Disabled]
Download & Install MyASUS service & app [Disabled]

I am attaching a picture of yesterday's curve.
Of course, this is not 100% good, as I am constantly changing and experimenting with it.
 

Anhänge

  • Curve_ac54x-2c57x.png
    Curve_ac54x-2c57x.png
    64,3 KB · Aufrufe: 52
Not fully :) there shouldnt be a need to reopen it even. It has to show a before and after curve
Use https://www.dropbox.com/scl/fi/pt1g87eezibpmob28uph5/OCPak.zip?dl=0&e=1&file_subpath=/OCPak/OCTool1018.zip&rlkey=crry69241xkdded867ojh1zre
Just to make sure.
Higher version doesnt mean its newer.

Higher version can be Alderlake Branch still.

EDIT:
Alternatively try a -145mV drop on P11 // maybe not stable
See if other points follow this.
It should;
Im also in middle of figuring out this curve thing, but im facing same exact issue as @Darkthrone. OCTool wont apply anything. Windows 10, 14900K, Apex Encore with bios 9905
 
Ey echt anstrengend....die letzten 3 1/2 Seiten nur Englisch.
Nicht das man es nicht übersetzen könnte....aber das ist doch ein deutsches Forum. :coffee2:
 
Und ein DDR5 OC Thread.
 
Then there is a lack of active TVB which prevents you from getting P10-P12.
But for now that's ok, you can push them down a bit
All of them a bit
P9 -80, ~ see if P7 follows, else P7 -50
P6 +10, P5 +30
This is what it looks like now.

Shouldn’t we also change/reduce P8?
Also when I run Cine23 it runs at x56 all core. Shouldn't it run at x57?
In bios Pcores/Ecores/Ring are set at Auto.
(As soon as I learn how this works I promise I will stop asking!)

veiivf.png
 
This is what it looks like now.
Basically make a smooth curve.
This is not a smooth curve :-)

I see the mistake, i misswrote P7 for P8
But yes drag them all slowly to make a smooth curve, with a flattened top
1717056121042.png

Drawing with a touchpad is hard :d
Good timezone, morning.

When you extend TVB later +2 , the curve extends
So we want a flatter top , for it not to spike up & a bigger bump in the middle near 4500-4700MHz as your ring is unstable.
 
Hardwareluxx setzt keine externen Werbe- und Tracking-Cookies ein. Auf unserer Webseite finden Sie nur noch Cookies nach berechtigtem Interesse (Art. 6 Abs. 1 Satz 1 lit. f DSGVO) oder eigene funktionelle Cookies. Durch die Nutzung unserer Webseite erklären Sie sich damit einverstanden, dass wir diese Cookies setzen. Mehr Informationen und Möglichkeiten zur Einstellung unserer Cookies finden Sie in unserer Datenschutzerklärung.


Zurück
Oben Unten refresh